React Native Simple Router
Awesome navigation for your React Native app.

Install
Make sure that you are in your React Native project directory and run:
$ npm install react-native-simple-router --save
Usage
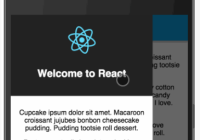
import Router from 'react-native-simple-router';The basics:
import React from 'react'; import { StyleSheet } from 'react-native'; // The initial page class HelloPage extends React.Component { render() { return <Text>Hello world!</Text>; } } const styles = StyleSheet.create({ header: { backgroundColor: '#5cafec', }, }); // Your route object should contain at least: // - The name of the route (which will become the navigation bar title) // - The component object for the page to render const firstRoute = { name: 'Welcome!', component: HelloPage, }; // The Router wrapper class MyApp extends React.Component { render() { return ( <Router firstRoute={firstRoute} headerStyle={styles.header} /> ); } } AppRegistry.registerComponent('routerTest', () => MyApp);Boom. That's it.
From the "Hello world!"-page you can then navigate further to a new component by calling this.props.toRoute(). Let's build upon the HelloPage component in our first example:
import React, { PropTypes } from 'react'; import { StyleSheet } from 'react-native'; const propTypes = { toRoute: PropTypes.func.isRequired, }; class HelloPage extends React.Component { constructor(props) { super(props); this.nextPage = this.nextPage.bind(this); } nextPage() { this.props.toRoute({ name: "A new screen", component: HelloPage }); } render() { return ( <View> <TouchableHighlight onPress={this.nextPage} underlayColor="transparent"> <Text>Next page please!</Text> </TouchableHighlight> </View> ); } } HelloPage.propTypes = propTypes; export default HelloPage;Now, when you click on "Next page please!", it will go to the next page (which in this case is still HelloPage but with a new title). Keep in mind that this.props.toRoute() needs to be called from one of the top-level routes, therefore, if your link is deeply nested within multiple components, you need to make sure that the action "bubbles up" until it reaches the parent route, which in turn calls this.props.toRoute().
Configurations
The <Router /> object used to initialize the navigation can take the following props:
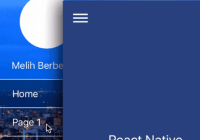
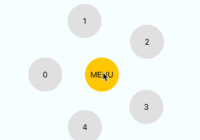
firstRoute(required): A React class corresponding to the first page of your navigationheaderStyle: Apply a StyleSheet to the navigation bar. You'll probably want to change the backgroundColor for example.titleStyle: Apply a StyleSheet to the navigation bar titles. Useful for changing the font or text color.bgStyleApply a StyleSheet to the background of all routes.statusBarColor: Specify the stringblackif you want the statusbar to be dark in color, or leave unspecified for alight-contentstyle. Refer to StatusBarIOS for details.borderBottomWidth: Apply a bottom border to your navbar.borderColor: Apply a border color to your bottom border.backButtonComponent: By default, the navigation bar will display a simple "Back" text for the back button. To change this, you can specify your own backButton component (like in the Twitter app).backButtonProps: If you set abackButtonComponentyou can use this property to pass props to that component.rightCorner: If you have the same occuring action buttons on the right side of your navigation bar (like the Twitter "Compose"-button), you can specify a component for that view.customAction: A special callback prop for your action buttons (this can be handy for triggering a side menu for example). The action gets triggered from your customleftCornerorrightCornercomponents by callingthis.props.customAction("someActionName")from them. It is then picked up like this:<Router customAction={this.doSomething} />.hideNavigationBar: Hide the navigation bar, alwayshandleBackAndroid(Boolean value): Apply a listener to the native back button on Android. On click, it will go to the previous route until it reach the first scene, then it will exit the app.statusBarProps: Default StatusBar props, please refer to StatusBar Docs. (Android) IfbackgroundColorisn't provided, it will take the same color as defined inheaderStyle.sceneConfig: Default animation to be used in case nosceneConfigis provided by thetoRoutefunction. More details and possible parameters are in thetoRoutedocumentation below. Defaults toNavigator.SceneConfigs.FloatFromRight.
The this.props.toRoute() callback prop takes one parameter (a JavaScript object) which can have the following keys:
name: The name of your route, which will be shown as the title of the navigation bar unless it is changed.component(required): The React class corresponding to the view you want to render.leftCorner: Specify a component to render on the left side of the navigation bar (like the "Add people"-button on the first page of the Twitter app)rightCorner: Specify a component to render on the right side of the navigation bartitleComponent: Specify a component to replace the title. This could for example be your logo (as in the first page of the Instagram app)headerStyle: Change the style of your header for the new route. You could for example specify a new backgroundColor and the router will automatically make a nice transition from one color to the other!titleStyle: Apply a StyleSheet to the navigation bar titles. Useful for changing the font or text color.passProps: Takes in an object. Passes eachkey: valuepair to your component as a prop. i.e.trans: If set to a truthy value it will make the navbar transparent and move your component content so that it sits behind the nav.noStatusBar: If hiding the navigationbar usinghideNavigationBaryou must set this option to true to not reserve the space on the top of the UIhideNavigationBar: If set to a truthy value will hide the navigationbar out of view, and move the component so that it is at the top of the screen.leftCornerProps: If you set aleftCornercomponent you can use this property to pass props to that component.rightCornerProps: If you set arightCornercomponent you can use this property to pass props to that component.titleProps: If you set atitleComponentyou can use this property to pass props to that component.sceneConfig: Control the animation of the route being switched. Possible values are:- Navigator.SceneConfigs.FadeAndroid
- Navigator.SceneConfigs.FloatFromBottom
- Navigator.SceneConfigs.FloatFromBottomAndroid
- Navigator.SceneConfigs.FloatFromLeft
- Navigator.SceneConfigs.FloatFromRight
- Navigator.SceneConfigs.HorizontalSwipeJump
- Navigator.SceneConfigs.PushFromLeft
- Navigator.SceneConfigs.PushFromRight
- Navigator.SceneConfigs.VerticalDownSwipeJump
- Navigator.SceneConfigs.VerticalUpSwipeJump
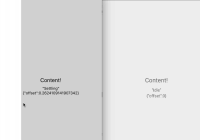
statusBarProps: Route specific StatusBar props, it will overridestatusBarPropsdefined in Router, please refer to StatusBar Docs.custom data: you may provide the route with additional data.goToTweet(tweetData) { this.props.toRoute({ name: 'Tweet', component: TweetPage, data: tweetData, }); } // in component TweetPage const { text, user, } = this.props.data;
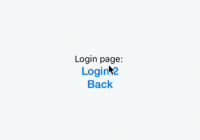
The this.props.replaceRoute function takes in an object that can contain the same keys as toRoute(). The difference is that instead of adding a route to your stack, it replaces the route that you're on with the new route that you pass it.
- This is useful for login or signup screens. If you don't want your user to be able to navigate back to it, then use
replaceRoute()rather thantoRoute().
The this.props.resetToRoute function takes in an object that can contain the same keys as toRoute(). The difference is that instead of adding a route to your stack, it replaces the route that you're on with the new route that you pass it, and empties the navigation stack as well.
- This is useful for going to an application after a login or signup screens. If you don't want your user to be able to navigate back to it, then use
resetToRoute()rather thanreplaceRoute().
The this.props.popToRoute function takes in an object that can contain the same keys as toRoute(). The difference is that instead of adding a route to your stack, it pop all routes until the desired one.
The this.props.getCurrentRoutes() returns the current list of routes (same as ReactNative Navigator getCurrentRoutes(0) ). This can be used as an argument for popToRoute().
The functions this.props.setRightProps, this.props.setLeftProps and this.props.setTitleProps take in an object of props and sends that to your navbar's RightComponent, LeftComponent or TitleComponent, respectively.
- This allows you to talk directly to your navbar, because previously you could only talk to it when navigating forward or backward.
As of 0.7.0 the router acts as a relay for events emitted by the navigator, and extends these to the following list:
willFocus: Emitted when a route will focus. Emits route object.didFocus: Emitted when a route did focus. Emits route object.willPop: Emitted when a route stack will be popped. Triggered byNavigator.pop();didPop: Emitted when a route stack did pop. Triggered byNavigator.pop();willPush: Emitted when a new route will be pushed to the route stack. Emits the new route object. Triggered byNavigator.push(route);didPush: Emitted when a new route has been pushed to the route stack. Emits the new route object. Triggered byNavigator.push(route);willResetTo: Emitted when the route stack will be reset to a given route. Emits the route object. Triggered byNavigator.resetTo(route);didResetTo: Emitted when the route stack has been reset to a given route. Emits the route object. Triggered byNavigator.resetTo(route);willReplace: Emitted when a route will replace the current one in the route stack. Emits the new route object. Triggered byNavigator.reset(route);didReplace: Emitted when a route has replaced the current one in the route stack. Emits the new route object. Triggered byNavigator.reset(route);willPopToTop: Emitted when the route stack will be popped to the top. Triggered byNavigator.popToTop();didPopToTop: Emitted when the route stack has been popped to the top. Triggered byNavigator.popToTop();willPopToRoute: Emitted when the route stack will be popped to the route. Triggered byNavigator.popToRoute(route);didPopToRoute: Emitted when the route stack has been popped to the route. Triggered byNavigator.popToRoute(route);
You can listen to these events by adding an event listener as such:
this.props.routeEmitter.addListener('didFocus', (route) => { console.log(route.name, 'didFocus'); });As of v0.8.0 the leftCorner, rightCorner and titleComponent have access to the following router functions :
toRoute(route)toBack()replaceRoute(route)resetToRoute(route)goToFirstRoute()popToRoute(route)
Examples
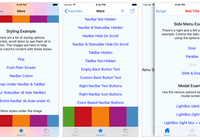
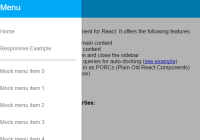
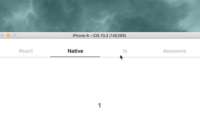
Explorer app
To see available features in action, you can check out the Explorer app.
Clone this repo or go inside node_modules/react-native-simple-router folder and install dependencies, after that you will able to launch this as an standalone react-native application.
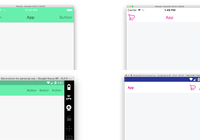
cd examples/Explorer npm install Twitter app
To see more of the router in action, you can check out the Twitter example app that comes with the package.
Test the app by requiring the TwitterApp component:
import { AppRegistry } from 'react-native'; import TwitterApp from './node_modules/react-native-simple-router/examples/twitter-example'; AppRegistry.registerComponent('routerTest', () => TwitterApp);