React Native Image Picker


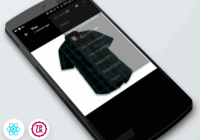
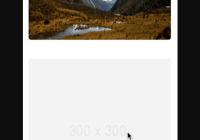
A React Native module that allows you to use native UI to select a photo/video from the device library or directly from the camera, like so:
| iOS | Android |
|---|---|
 |  |
Before you open an issue
This library started as a basic bridge of the native iOS image picker, and I want to keep it that way. As such, functionality beyond what the native UIImagePickerController supports will not be supported here. Multiple image selection, more control over the crop tool, and landscape support are things missing from the native iOS functionality - not issues with my library. If you need these things, react-native-image-crop-picker might be a better choice for you.
React Native Compatibility
To use this library you need to ensure you are using the correct version of React Native. If you are using a version of React Native that is lower than 0.57 you will need to upgrade that before attempting to use this library.
@react-native-community/netinfo version | Required React Native Version |
|---|---|
1.x.x | >= 0.60 or >= 0.59 if using Jetifier |
0.x.x | <= 0.59 |
Getting Started
yarn add react-native-image-picker react-native link react-native-image-picker You will also need to add UsageDescription on iOS and some permissions on Android, refer to the Install doc.
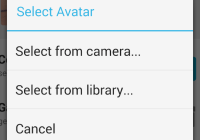
Usage
import ImagePicker from 'react-native-image-picker'; // More info on all the options is below in the API Reference... just some common use cases shown here const options = { title: 'Select Avatar', customButtons: [{ name: 'fb', title: 'Choose Photo from Facebook' }], storageOptions: { skipBackup: true, path: 'images', }, }; /** * The first arg is the options object for customization (it can also be null or omitted for default options), * The second arg is the callback which sends object: response (more info in the API Reference) */ ImagePicker.showImagePicker(options, (response) => { console.log('Response = ', response); if (response.didCancel) { console.log('User cancelled image picker'); } else if (response.error) { console.log('ImagePicker Error: ', response.error); } else if (response.customButton) { console.log('User tapped custom button: ', response.customButton); } else { const source = { uri: response.uri }; // You can also display the image using data: // const source = { uri: 'data:image/jpeg;base64,' + response.data }; this.setState({ avatarSource: source, }); } });Then later, if you want to display this image in your render() method:
<Image source={this.state.avatarSource} style={styles.uploadAvatar} />Directly Launching the Camera or Image Library
To Launch the Camera or Image Library directly (skipping the alert dialog) you can do the following:
// Launch Camera: ImagePicker.launchCamera(options, (response) => { // Same code as in above section! }); // Open Image Library: ImagePicker.launchImageLibrary(options, (response) => { // Same code as in above section! });Notes
On iOS, don't assume that the absolute uri returned will persist. See #107
For more, read the API Reference.