React Vertex
Hooks-based WebGL library for React
This library is experimental.
npm install @react-vertex/core
I started working on this to try out hooks and learn more about WebGL. It quickly got out of hand. There's a lot to do still. It's unlikely to be truly stable for production applications until late 2019.
If you have some WebGL/GLSL chops or experience with 3D engines and would like to help out, drop a line in the issues.
Documentation and Examples
All the demos on the site are in the demos folder
What's been built
- Scene renderer using React Reconciler
- Scene graph which handles matrix multiplication
- Basic lighting system (only point lights so far)
- Orbit camera and controls
- Hooks for geometries and materials
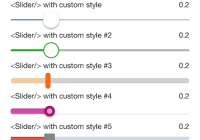
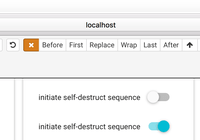
- Dat Gui like dev controls and scene helpers
Roadmap
- Particle Systems / GPGPU
- WebGL2 w/ Fallback
- Use quaternions for rotations
- Optimize matrix calculations
- More lighting options
- Better materials and shaders
- Events/raycasting
- Scene shadows
- Composite effects
- Improve camera options
- Tests
CodeSandbox
Keep in mind these sandboxes run in "development" mode and, just like for React, that makes a significant difference in performance for this library.
- Sphere of Spheres - Basic scene with Phong shading and a single point light.
- Sphere Wireframe - Simple sphere wireframe example with axes.
- Starter Sandbox - Starter sandbox with axes.
Packages:
@react-vertex/core


React components, renderer and hooks for React Vertex.
npm install @react-vertex/core
Documentation for Core
@react-vertex/geometry-hooks

React hooks for working with geometries in React Vertex.
npm install @react-vertex/geometry-hooks
Documentation for Geometry Hooks
@react-vertex/material-hooks

React hooks for working with materials in React Vertex.
npm install @react-vertex/material-hooks
Documentation for Material Hooks
@react-vertex/math-hooks

React hooks for working with vectors and matrices in React Vertex. Almost all of this is gl-matrix so this adds very little to your bundle. The core also relies on gl-matrix.
npm install @react-vertex/math-hooks
Documentation for Math Hooks
@react-vertex/orbit-camera

React hooks for a basic orbit camera and controls. Almost all of this is gl-matrix so this adds very little to your bundle. The core also relies on gl-matrix.
npm install @react-vertex/orbit-camera
Documentation for Orbit Camera
How does it work?
Inside of a <Canvas /> component you are no longer building an HTML document. Instead, a React Vertex scene is built of four primary elements: <camera>, <group>, <material> and <geometry>. You use the elements to build up the WebGL state used by the renderer.
At its most simple, a scene would look like:
<camera> <material> <geometry /> </material> </camera>Or something like:
<camera> <group> <material> <group> <geometry /> <geometry /> <geometry /> </group> </material> <material> <group> <material> <geometry /> </material> <geometry /> <geometry /> </group> </material> </group> </camera>Of course, you can create your own custom components to build up that document however you like:
<camera> <group> <Asteroids /> <Robots /> {showSharks ? ( <group> <Shark weapon={laserBeam} /> <Shark weapon={laserBeam} /> </group> ) : null} </group> <SeaBass illTempered={true} /> </camera><camera>
The camera takes just two props that define the view (matrix) and the projection (matrix):
<camera view={view} projection={projection}> <material> <geometry /> <geometry /> <geometry /> </material> </camera>The view and projection should be instances of gl-matrix mat4. If you already know how to work with gl-matrix then you can use whatever method you like to keep those props up to date. You can mutate the matrices and the changes will be reflected in the render.
For convenience you can use @react-vertex/math-hooks to create a static camera view:
import { useInvertedMatrix, usePerspectiveMatrix, } from '@react-vertex/math-hooks' function Scene() { const view = useInvertedMatrix(0, 0, 50) const projection = usePerspectiveMatrix(35, 1.0, 0.1, 1000) ... return ( <camera view={view} projection={projection}> ... </camera> )Or use @react-vertex/orbit-camera to create a dynamic camera:
import { useOrbitCamera, useOrbitControls } from '@react-vertex/orbit-camera' import { useCanvasSize } from '@react-vertex/core' function Scene() { const { width, height } = useCanvasSize() const camera = useOrbitCamera(55, width / height, 1, 5000) useOrbitControls(camera) ... return ( <camera view={camera.view} projection={camera.projection}> ... </camera> )<material>
Right now, the material nodes just take a single program prop. The program is a WebGL program returned from a hook. The nearest <camera> ancestor will define the view and projection. The renderer will set viewMatrix, modelMatrix and projectionMatrix uniforms in the program shaders. You can use @react-vertex/material-hooks for some common programs or look at the source to compose your own custom program hooks. The Phong and Lambert programs in @react-vertex/material-hooks make use of lights in the scene.
import React from 'react' import PropTypes from 'prop-types' import { useHex } from '@react-vertex/color-hooks' import { useSphereElements } from '@react-vertex/geometry-hooks' import { useBasicSolid } from '@react-vertex/material-hooks' function Example({ position }) { const sphere = useSphereElements(0.75, 10, 10) const diffuse = useHex('#ffa500', true) const program = useBasicSolid(diffuse) return ( <material program={program}> <geometry position={position} {...sphere} /> </material> ) } Example.propTypes = { position: PropTypes.array.isRequired, } export default Example<geometry>
The <geometry> element defines the attributes and several other parameters for drawing. You can also set the position, rotation and scale. The nearest <material> ancestor will define what program is applied to the geometries. Probably, the easiest way to get started is to use the hooks from @react-vertex/geometry-hooks.
import React from 'react' import { useVector3 } from '@react-vertex/math-hooks' import { useBoxElements } from '@react-vertex/geometry-hooks' const PI = Math.PI function Boxes() { const boxElements = useBoxElements(10, 10, 10) const r1 = useVector3(PI / 4, PI, 0) const p1 = useVector3(10, 0, 0) const p2 = useVector3(20, 0, 0) const p3 = useVector3(30, 0, 0) const p4 = useVector3(40, 0, 0) return ( <group rotation={r1}> <geometry position={p1} {...boxElements} /> <geometry position={p2} {...boxElements} /> <geometry position={p3} {...boxElements} /> <geometry position={p4} {...boxElements} /> </group> ) }To get more control over the geometry buffers and attributes you can use some of the more low-level hooks from the @react-vertex/core:
import React, { Fragment, useMemo } from 'react' import { useVector3 } from '@react-vertex/math-hooks' import { useBoxGeometry } from '@react-vertex/geometry-hooks' import { useWebGLContext, useStaticBuffer, useAttribute } from '@react-vertex/core' function Boxes() { const geometry = useBoxGeometry(10, 10, 10) // this is what "useBoxElements" does internally... const gl = useWebGLContext() const positionBuffer = useStaticBuffer(gl, geometry.vertices, false, 'F32') const position = useAttribute(gl, 3, positionBuffer) const normalBuffer = useStaticBuffer(gl, geometry.normals, false, 'F32') const normal = useAttribute(gl, 3, normalBuffer) const uvBuffer = useStaticBuffer(gl, geometry.uvs, false, 'F32') const uv = useAttribute(gl, 2, uvBuffer) const indexBuffer = useStaticBuffer(gl, geometry.indices, true, 'U16') const boxElements = useMemo( () => ({ index: indexBuffer, attributes: { position, normal, uv }, drawElements: { mode: 'TRIANGLES', count: geometry.indices.length }, }), [indexBuffer, geometry.indices.length, position, normal, uv], ) const r1 = useVector3(PI / 4, PI, 0) const p1 = useVector3(10, 0, 0) const p2 = useVector3(20, 0, 0) const p3 = useVector3(30, 0, 0) const p4 = useVector3(40, 0, 0) return ( <group rotation={r1}> <geometry position={p1} {...boxElements} /> <geometry position={p2} {...boxElements} /> <geometry position={p3} {...boxElements} /> <geometry position={p4} {...boxElements} /> </group> ) }Rendering
By default nothing will be rendered. You can set the renderOnUpdate prop on the Canvas component to true to have it work something like a regular react component tree. If the scene has lots of elements or is animating constantly it's going to make more sense to render it in more controlled way with the useRender hook.
Rendering in a loop
You can get a function to render the scene by calling useRender anywhere in a React Vertex component tree. If your scene is animating constantly, it's probably best to have one loop right at the root of the tree that renders on each frame. You can use d3-timer to create a loop like so:
import React, { useEffect } from 'react' import { timer } from 'd3-timer' import { useRender } from '@react-vertex/core' function Scene() { const renderScene = useRender() useEffect(() => { const timerLoop = timer(renderScene) return () => timerLoop.stop() }, [renderScene]) ...Rendering when camera updates
If you want to render when the camera moves. You can do something like the below example. If you look at the "Tuna Wireframe" example, it updates when the camera changes and ALSO sets the renderOnUpdate prop on the canvas to true to make sure it renders when the controls in the scene update. If you are creating more of an app that has less frequent state updates and mainly responding to user input that's a pretty efficient way to approach it.
import React, { useEffect } from 'react' import { useRender, useCanvasSize } from '@react-vertex/core' import { useOrbitCamera, useOrbitControls } from '@react-vertex/orbit-camera' function Scene() { const { width, height } = useCanvasSize() const renderScene = useRender() const camera = useOrbitCamera(55, width / height, 1, 5000) useOrbitControls(camera) useEffect(() => { renderScene() camera.addListener(renderScene) return () => camera.removeListener(renderScene) }, [camera, renderScene]) ...Running the repo locally
git clone [email protected]:sghall/react-vertex.git cd react-vertex npm install && npm run dev // You may need to bootstrap lerna as well npx lerna bootstrap Adding a demo
First, note that the root of the repo is a nextjs app. There's a pages folder and a static folder and so on. There's a babel.config.js at the root of the repo that aliases the packages so you can use them directly from source in the demos.
Steps:
-
Probably easiest to copy an existing demo in the
demosfolder and give it a new name (something short and sweet that is at least vaguely descriptive). Pro-tip: Get the existing demo running at the new location and THEN add your demo code. -
Add a page (copy an existing) to the
pagesfolder using the conventiondemo-my-demo.js(this a static site with no dynamic pages that the reason for the "demo-" prefix). All of the code should be in thedemosfolder so someone can see the whole thing without hunting around and copy it to their environment etc. So just make a minimal page pointing to your demo. See the existing pages for an example. -
Add your demo to
demosListin thedocs/config.jsso it will appear on the sidebar menu. -
Then (if you have already run
npm install) typenpm run devto start developing.