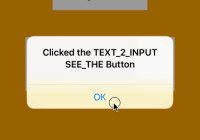
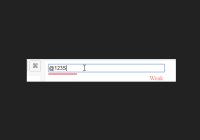
React Native TextInput Utils (iOS only)
A react native extendsion which allows you to control TextInput better.
The original name is react-native-keyboard-toolbar, because the latest add some features, I think the old name is not suitable for this package.
Timeline
0.3.7 - Now support RN 0.40
0.3.6 - New feature of setPickerRowByIndex and reloadPickerData by @DaveAdams88
0.2.5 - Added the fully support of multiline <TextInput/>
0.2.1 - Added the support of tintColor, which can set the cursor color
0.2 - Added the support of dismissKeyboard, moveCursorToLast and setSelection
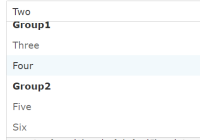
0.1 - Added the support of setting an UIPickerView as the inputView
What can I do?
- Adding
UITabBarItem(s) into the keyboard of<TextInput/> - Adding a
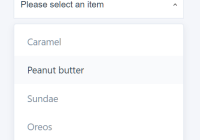
UIPickerViewas a default keyboard of<TextInput/> - Setting the selection area or cursor using only two parameters, which are
startandlength
The PickerIOS Component in React Native 0.13 cannot be styled well outside NavigatorIOS
Limitation
This extension does not support <TextInput/> with multiline={true}, and I need some time to figure out. If you got some idea, it will really welcome to send me a PR.
Installation
I am still very simple to use
cd to your React Native project directory and run
npm install react-native-textinput-utils --save
How to run
Runing the demo
Download and open the RCTTextInputUtilsDemo.xcodeproj file, and runs.
Using this package in other project
You might need to add the es7.classProperties into your PROJECT_ROOT/npm_modules/react-native/packager/transformer.js and PROJECT_ROOT/npm_modules/react-native/packager/react-packager/.babelrc
iOS configuration
- In XCode, in the project navigator right click
Libraries➜Add Files to [your project's name] - Go to
node_modules➜react-native-textinput-utilsand ADDRCTTextInputUtils.xcodeproj - Drag
libRCTKeyboardToolbar.a(from 'Products' under RCTTextInputUtils.xcodeproj) intoGeneral➜Linked Frameworks and Librariesphase. (GIF below) - Run your project (
Cmd+R)
Basic Usage
var RCTKeyboardToolbarTextInput = require('react-native-textinput-utils');<RCTKeyboardToolbarTextInput leftButtonText='I_AM_CANCEL_BUTTON' rightButtonText='I_AM_DONE_BUTTON' onCancel={(dismissKeyboard)=>dismissKeyboard()} onDone={(dismissKeyboard)=>dismissKeyboard()} />If you want a UIPickerView
var pickerViewData = [ { label: 'One', value: 'ValueOne' }, { label: 'Two', value: 'ValueTwo' }, { label: 'Three', value: 'ValueThree' } ];<RCTKeyboardToolbarTextInput pickerViewData={pickerViewData} onPickerSelect={(selectedIndex)=>{console.log(`selected ${selectedIndex}`)}} ... />If you want to set the cursor color
<RCTKeyboardToolbarTextInput tintColor='red' ... />If you want to set the selection area
<RCTKeyboardToolbarTextInput ref='reference' ... />and you can call
this.refs['reference'].setSelection(start, length);Or you just want to simply move the cursor to the last
this.refs['reference'].moveCursorToLast();Or dismiss the keyboard whenever you want
this.refs['reference'].dismissKeyboard();Configurations
The <TabBarNavigator/> object can take the following props:
Basic Parameters
leftButtonText: The text in the left-sideUIToolBarItem, if this value is empty, the UIToolBarItem on the left side will not be createdrightButtonText: The text in the right-sideUIToolBarItem, if this value is empty, the UIToolBarItem on the right side will not be createdonCancel: The callback function of left-sideUIToolBarItemonDone: The callback function of right-sideUIToolBarItemtintColor: The cusor color
And both onCancel and onDone will passing an function back, if you call that function, the keyboard will be dismissed.
function onCancel_Or_onDone(dismissKeyboardFunction) { console.log(`I will dismiss the keyboard`); dismissKeyboardFunction(); }PickerView related Parameters
pickerViewData: The data source of thePickerView, should be anArray, which each element is anObject, and thelabelin eachObjectwill be display in thePickerViewonPickerSelect: The callback function when user picks an option, will pass theselectedIndexback, you can use this index to reference back to your dataArray
function onPickerSelectCallback(selectedIndex) { console.log(`Selected Index is ${selectedIndex}`); }If you set the ref props of this Component, you can reference it back after constructor is called. You can use this.refs[YOUR_REFERENCE] to access the Component`s related methods.
Here is the methods
dismissKeyboard: If you want to dismiss the keyboard or theUIPickerView, just call it.moveCursorToLast: If you want to set the cursor to the last position, just call it.setSelection(start, length): Using this method, you can set the selection area, if thelength = 0, the cursor will move tostartposition.
Questions
If something is undocumented here, and it is not clear with you, feel free to create an issue here, I will tried my best to answer you.
Anything else
Feel free to request new features, just create an issue. It will be very welcome to pull request for me.
My email [email protected]
Facebook Dicky Tsang
Sina Weibo @桐乃
