


angular-flash
A simple lightweight flash message module for AngularJS and Bootstrap.
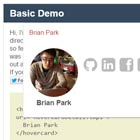
Demo
angular-flash | jsfiddle | codepen
Install
npm
You can also find angular-flash on npm
$ npm install angular-flash-alertBower
You can Install angular-flash using the Bower package manager.
$ bower install angular-flash-alert --saveAdd the Following code to the <head> of your document.
<link type="text/css" rel="stylesheet" href="dist/angular-flash.min.css" /> // If you are using bootstrap v3 no need to include angular-flash.css <script src="http://ajax.googleapis.com/ajax/libs/angularjs/1.4.8/angular.min.js"></script> <script src="dist/angular-flash.min.js"></script> // Do not include both angular-flash.js and angular-flash.min.jsAdd ngFlash dependency to your module
var myApp = angular.module("app", ["ngFlash"])Include directive below in your HTML template.
<flash-message></flash-message> Configure
You can configure angular-flash by two ways:
Add attributes on the <flash-message> directive.
<flash-message duration="5000" show-close="true" on-dismiss="myCallback(flash);" ></flash-message> <!-- 5000ms as the default duration to show flash message. Show the close button (x on the right). Call myCallback with flash dismissed as parameter when flash has been dismissed. -->Set configuration with flashProvider.
app.config((FlashProvider) => { FlashProvider.setTimeout(5000); FlashProvider.setShowClose(true); FlashProvider.setOnDismiss(myCallback); });Use a custom template
By default, angular-flash use the Bootstrap flash standard template, but you can set your own template.
By giving it in the Js: use .setTemplate(...) with the template in parameter.
app.config((FlashProvider) => { FlashProvider.setTemplate(` <div class="my-flash">{{ flash.text }}</div> `); });By giving it in the HTML: use .setTemplatePreset('transclude') with the template transcluded in the <flash-message> directive.
app.config((FlashProvider) => { FlashProvider.setTemplatePreset('transclude'); });<flash-message> <div class="my-flash">{{ flash.text }}</div> </flash-message>How to use
Inject the Flash factory in your controller
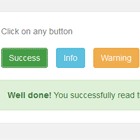
myApp.controller('demoCtrl', ['Flash', function(Flash) { $scope.successAlert = function () { var message = '<strong>Well done!</strong> You successfully read this important alert message.'; var id = Flash.create('success', message, 0, {class: 'custom-class', id: 'custom-id'}, true); // First argument (string) is the type of the flash alert. // Second argument (string) is the message displays in the flash alert (HTML is ok). // Third argument (number, optional) is the duration of showing the flash. 0 to not automatically hide flash (user needs to click the cross on top-right corner). // Fourth argument (object, optional) is the custom class and id to be added for the flash message created. // Fifth argument (boolean, optional) is the visibility of close button for this flash. // Returns the unique id of flash message that can be used to call Flash.dismiss(id); to dismiss the flash message. } }]);Flash types
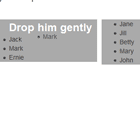
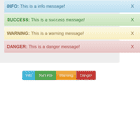
- success
- info
- warning
- danger
Methods
These methods are mostly for internal usage but can be used also from outside.
Flash.dismiss(1); // Dismiss the flash with id of 1. Id is not the index of flash but instead a value returned by Flash.create()Flash.clear(); // Dismisses all flashes shown.Animating
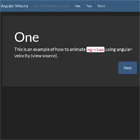
You can animate the flash messages via traditional Angular way by including ngAnimate as a dependency of your application and then defining the CSS transitions for different classes (ng-enter, ng-move, ng-leave) provided by Angular.
Example:
.alert.ng-leave { opacity: 1; transition: opacity 1.5s ease-out; } .alert.ng-leave-active { opacity: 0; } Multiple flash containers
You can send flashes to different containers by naming them and specifying their name in the config you pass to the Flash.create function.
<flash-message name="flash-fixed"></flash-message>Flash.create('success', 'Hooray!', 0, {container: 'flash-fixed'});Guidelines for contributors
Running tests
You'll need relatively new versions of Firefox and Chrome installed on your local system to run the tests.
Once you do, run:
npm install npm run test Contributors
- Sachin Choluur (Original author)
- Roope Hakulinen (Version 2)
- Nicolas Coden
License
MIT © Sachin Choluur