jquery.cssAnimateAuto
CURRENTLY UNMAINTAINED: LOOKING FOR A NEW MAINTAINER! If you like and use this module, please consider taking over. File an issue to let me know you're interested!
A jQuery plugin that uses CSS transitions to animate an element's height or width to or from auto.
Installation
There a few ways to do this:
npm install jquery.cssanimateauto.- Get the latest release on Github.
- Install with Bower:
bower install jquery.cssAnimateAuto --save-dev.
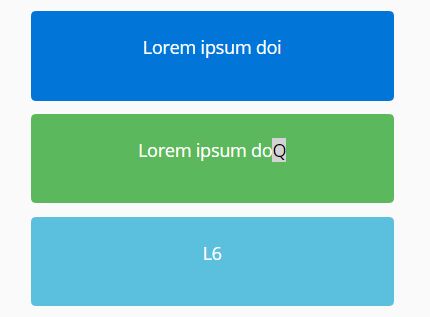
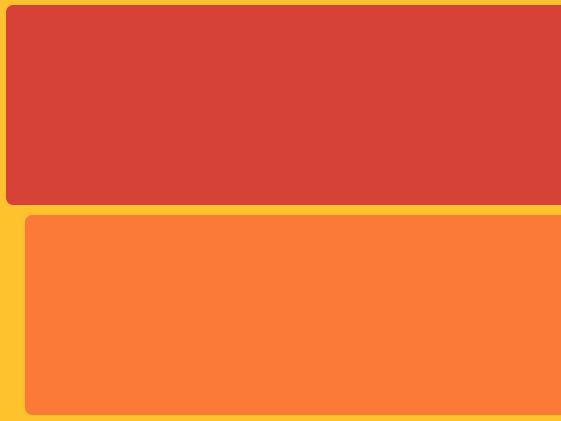
Demonstration
Please observe the demonstration.
Why you need this
You, like everybody else, enjoy making things slide open and closed -- but neither CSS nor jQuery allow you to slide dimensions to auto, and very often that's exactly what you need to do.
You have tried various workarounds (e.g. CSS-transitioning max-height instead of height) but have been annoyed by their limitations and weaknesses. Perhaps you have already found a JavaScript snippet for solving this problem, but the snippet eventually disappointed you, in one way or another, and you once again cursed under your breath. The snippet wasn't enough.
So: Let's stop messing around and develop an open-source jQuery plugin that solves this silly problem, as well as it can be solved. All the isolated partially useful snippets -- it's ridiculous --
That is what this simple plugin aspires to be: an open-source jQuery plugin that solves this silly problem, benefitting from the input of anyone willing to provide input.
Here are some of this plugin's features that address issues I've had with other snippets:
- Standard jQuery plugin structure, with modifiable defaults.
- Customizable CSS transitioning -- that is, you can pass any CSS transition shorthand you might like, with easing-functions, delays, etc.
- The transition is applied with JavaScript and removed when it's finished.
- After the element has animated to
auto, its dimension's value actually isauto(not fixed to a calculated "open" value) -- in case the layout changes again later and you need it not to have a fixed height. - You can pass a callback!
- The dimension-value to which we'll animate should be accurately calculated (by creating a clone, appended to the original element's parent, with the same opposite dimension value as the original element).
- Flexible arguments (see below).
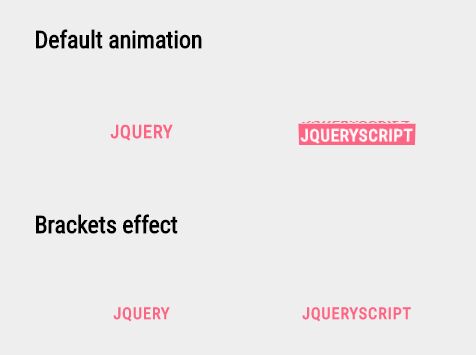
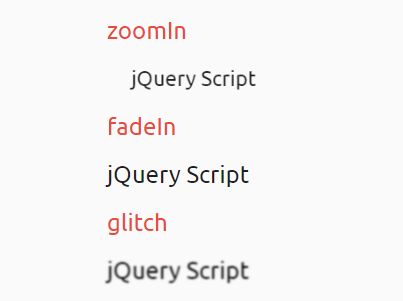
- An
openClassis applied (and removed in turn), to allow for compound effects (e.g. after the height slides open, the content fades in). - A timed fallback is there when you need it, in cases when the
transitionendevent you expected never actually fires (which does happen, sometimes). - Go from
autoto a defined value.
If, however, this plugin has not solved all the problems that YOU have run into, if you are still dissatisfied, still resorting to workarounds you don't like, please contribute and make the plugin better!
Arguments
The following arguments are all optional and can be passed in any order.
(You might also consider skipping to the examples below, especially if you've been here before.)
Options
- type:
Objector a limited variety of independentStrings
Pass an object argument and it will be interpreted as options. The default options object looks like this:
{ transition: 'height 0.3s', // any CSS transition (shorthand) prop action: 'toggle', // or 'open' or 'close' openClass: 'is-opened', eventNamespace: 'cssaa', to: false // any height value }These defaults can be modified for your project by changing $.fn.cssAnimateAuto.defaults.
The following options are available:
transition
- type:
String - default:
'height 0.3s' - passed as: a string or part of the Options object.
A value for the CSS shorthand property transition.
The transition-property value must be width or height, and all the other parameters should work just like in CSS.
Note this: If you want to animate width, be warned that width only works well if the content has a fixed height, or a min-height and content that will not exceed that min-height as width expands.
// e.g. $('#element').cssAnimateAuto('width 0.5s ease-out'); $('#element').cssAnimateAuto({ transition: 'width 0.5s ease-out' });action
- type:
String - default:
'toggle' - options:
'toggle','open','close' - passed as: a string or part of the Options object.
Which action should be performed?
// e.g. $('#element').cssAnimateAuto('open'); $('#element').cssAnimateAuto({ action: 'open' });openClass
- type:
String - default:
is-opened - passed as: part of the Options object.
What class should be applied to the element when it is opened?
This class is used within the plugin to test whether or not the element is opened. It can also be used by you to add CSS rules unique to the open state.
// e.g. $('#element').cssAnimateAuto({ openClass: 'thing-active' });eventNamespace
- type:
String - default:
cssaa - passed as: part of the Options object.
A namespace for the events that the plugin will use. You probably won't need to change this -- but if you do need to, you can.
to
- type:
String - default:
false - passed as: a string or part of the Options object
Tell the plugin you are going from auto to a defined value, instead of the other way around -- e.g. your element starts open (at height: auto), and the first thing you're going to do is close it to height: 0. Any CSS length value can be used, not just pixels.
// e.g. $('#element').cssAnimateAuto('to 0'); $('#element').cssAnimateAuto({ to: '0' }); $('#element').cssAnimateAuto('to 3rem'); $('#element').cssAnimateAuto({ to: '30px' });Callback
- type:
Function
A function to call at the end of the CSS transition.
// e.g. $('#element').cssAnimateAuto(function() { alert('You did it!'); }); function cheer() { alert('Hooray!'); } $('#element').cssAnimateAuto(cheer);Examples
// Default $('#element').cssAnimateAuto(); // Close the element (or if it's already closed, ignore) $('#element').cssAnimateAuto('close'); // Use linear easing and fast animation $('#element').cssAnimateAuto('height 0.1s linear'); // Animate width $('#element').cssAnimateAuto('width 0.3s'); // Use a callback and pass a couple of options function doThisAfter() { // something you want done } $('#element').cssAnimateAuto({ transition: 'width 0.3s steps(4, end)', action: 'close' }, doThisAfter); // Make a button animate the height of your // element to `auto`. $('#button').click(function() { $('#element').cssAnimateAuto(); }); // Different open and close buttons. $('#open-button').click(function() { $('#element').cssAnimateAuto('open'); }); $('#close-button').click(function() { $('#element').cssAnimateAuto('close'); }); // Only open, and add a special openClass, // then call a callback. $('#element').cssAnimateAuto({ action: 'open' openClass: 'thing-active' }, function() { alert('You did it again!'); }); // or do the same thing with differently written arguments $('#element').cssAnimateAuto('open', function() { alert('Three cheers for you!'); }, { openClass: 'thing-active' }); // go from auto to zero $('#element').cssAnimateAuto('to 0'); // Change the default openClass for your project $.fn.cssAnimateAuto.defaults.openClass = 'my-different-class';Known Limitations
- The element whose dimension you are transitioning to/from
autoshould not have other transitions in place. Sorry. You are welcome to attach your opacity-transition or whatever it is to a presentational div inside the element. TheopenClassis there to help you do this. - As you may have guessed, this plugin will only transition in browsers that support CSS transitioning. It doesn't currently bother with a jQuery-animation fallback or anything like that.
References
I found these articles particularly helpful.