JS Radio Toggle
A very simple jquery plugin to make a toggle content using radio button, you can see demo here
How To Use?
Include jQuery and JsRadioToggle
To use JsRadioToggle, you’ll need to make sure both the JsRadioToggle and jQuery scripts are included. If you’ve already got jQuery (you can test by opening your JavaScript console and typing !!window.jQuery — if it says true, you have jQuery), you don’t need to add the first line.
<script src="//code.jquery.com/jquery-latest.min.js"></script> <script src="https://github.com/muslih/JS-Radio-Toggle/blob/master/public/jsradiotoggle.js"></script>Ready Your HTML
JsRadioToggle doesn’t need any really awkward markup. In fact, all you need is a toggle class, input radio name with data-toggle, and .target. An example of some JsRadioToggle-friendly HTML is on the bottom.
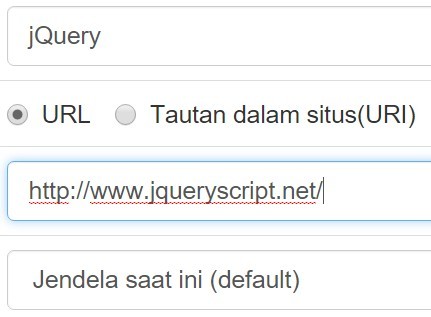
<div class="toggle"> <label class="radio-inline"> <input type="radio" name="tipe" id="url" value="option1" data-toggle="#url"> URL </label> <label class="radio-inline"> <input type="radio" name="tipe" id="tautan" value="tautan" data-toggle="#tautan" > Tautan dalam situs(URI) </label> <label class="radio-inline"> <input type="radio" name="tipe" id="modul" value="modul" data-toggle="#modul"> Modul </label> <label class="radio-inline"> <input type="radio" name="tipe" id="halaman" value="halaman" data-toggle="#halaman"> Halaman </label> </div>You can add as many radio button as you want: the example on the right just has three for the sake of brevity.
And below are target, make sure you add target class and use right data-toggle id on your target content
<tr id="url" class="target"> <td><label for="url">URL</label> </td> <td> <input type="text" name="url" class="form-control"> </td> </tr> <tr id="tautan" class="target"> <td><label for="uri">URI</label> </td> <td> <input type="text" name="uri" class="form-control"> </td> </tr> <tr id="modul" class="target"> <td><label for="modul">Modul</label> </td> <td> <select name="modul" id="modul" class="form-control"> <option value="">Select an option</option> </select> </td> </tr>Plug It All Together
We’ve been through so much together, and I’m pleased to say the finish line is near. Our journey is almost over, just one more thing left to do. The JavaScript is on the bottom (make sure to put it in a script tag, and change .toggle to whatever your element is).
$(document).ready(function(){ $('.toggle').jsRadioToggle(); })#Option Although it’s lightweight, JsRadioToggle comes with a range of options to customise as you want. Here’s the default options provided. You can add, remove, or completely skip out the options object. It’s up to you.
$(document).ready(function(){ $('.toggle').jsRadioToggle({ active : true // enable/disable for selected attributes name : "tipe", // Radio input name attributes target : ".target" // Target object that will triggered when radio clicked }); })