jQuery_panelSlider
A simple panel slider widget for jQuery UI
Usage of panelSlider
For now the panelSlider only works with id tags (not class tags). This is quite simple to change, but I would like to see an actual usage of classes before altering the widget.
For making the panel slider work you need to do the following:
- Create a html file and insert the necessary javascript libraries (go to jQuery website to fetch the latest versions)
<script src="http://code.jquery.com/jquery-1.11.1.min.js"></script><script src="//code.jquery.com/ui/1.11.4/jquery-ui.js"></script> - You then need to declare the panelSlider variable like this: var panelSlide=null;
- Then within the jQuery
$(function(){})you should initialise the panelSlier by intering this linepanelSlide = $("#wrapper").panelSlider({panels:["view1","view2","view3"]});.- $("#wrapper") is the existing jQuery object you want to attach the panel slider to. In this case I'm using a div with an id=wrapper.
- .panelSlider() means that I'm making the jQuery object into a panelslider.
- The dictionary within the creation of the panelSlider {panels:["view1","view2","view3"]} is a list of registered panels. Each list element is the id of an object
When the above steps have been fulfilled the panel slider can be used in two ways:
Calling a function directly on the widget
Using the actual panel sliding can be done by calling the slide function directly on the panelSlide instance like this: panelSlide.panelSlider("slide","view1",true);. The first parameter refers to the slide function of the jQuery widget. The second parameter "view1" refers to the id of the panel you want to go to. The third parameter can be true or false depending on whether you want the sliding effect to be moving forward or backwards. *If true then the effect is backwards moving. Sliding from left to right *If false then the effect is forwards moving. Sliding from right to left.
Calling it through the href attribute of a a tag
If an a tag is used as the clickable object for activating the sliding effect, then there is shortcut available. As seen in this example code: <a href="view2" class="btn btn-primary btn-large">Go to view 2</a> it's possible to just refer to the id of the panel that you want to go to. Take a look at the href attribute. href just refers to "view2". Since this id is in the list of registered panels, magic will happen behind the scene, and you will automatically be referred to the next panel.
##Adding new panels runtime When the panel slider has been initialised, it's possible to add new panels to the panelslider. That is done as follows panelSlide.panelSlider("addPanel","view4");. The first parameter is the name of the function, and the second is the id of the element you want to add to the panel list
##Removing panels runtime When the panel slider has been initialised, it's possible to remove panels from the panelslider. That is done as follows panelSlide.panelSlider("removePanel","view4");. The first parameter is the name of the function, and the second is the id of the element you want to remove from the panel list
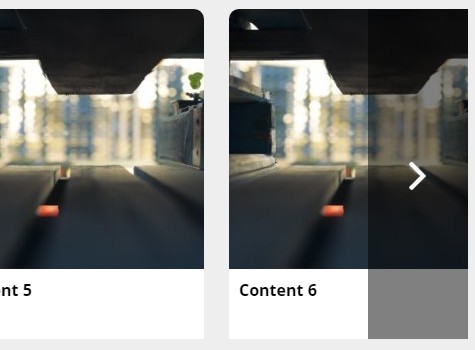
#Running example Find a running example here: http://kognitionsdesign.dk/tools/jQuery_panelSlider/
#Full example
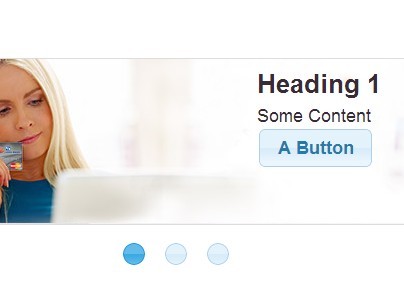
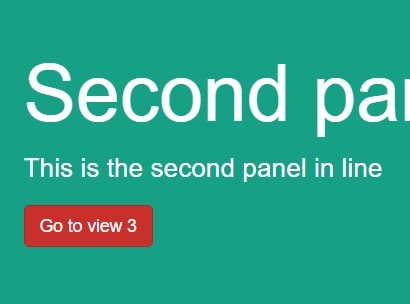
<!DOCTYPE html> <head> <meta charset="utf-8"> <meta name="viewport" content="width=device-width, initial-scale=1"> <link rel="stylesheet" href="https://maxcdn.bootstrapcdn.com/bootstrap/3.3.5/css/bootstrap.min.css"> </head> <body> <!--jQuery and jQuery-ui are required for this widget to work --> <script src="http://code.jquery.com/jquery-1.11.1.min.js"></script> <script src="//code.jquery.com/ui/1.11.4/jquery-ui.js"></script> <script src="https://maxcdn.bootstrapcdn.com/bootstrap/3.3.5/js/bootstrap.min.js"></script> <!-- Here we add the panel slider jQuery UI widget --> <script src="panelSlider.js"></script> <script type="text/javascript"> /* Declaring the panelSlide variable here, so it's available in all javascript functions. */ var panelSlide=null; $(function() { /* Initialise the panelSlider with a list of id's which should be slideable, and attach the panelSlide widget to a specific DOM object (in this case the div with it 'wrapper') */ panelSlide = $("#wrapper").panelSlider({panels:["view1","view2","view3"]}); //Here we add an extra panel after initialisation panelSlide.panelSlider("addPanel","view4"); //How to use sliding with click event on other than a elements $("#view4").click(function(){ panelSlide.panelSlider("slide","view1",true); }); }); </script> <div id="wrapper"> <div class="jumbotron" id="view1"> <div class="container"> <h1>First panel</h1> <p>This is the first panel in line</p> <a href="view2" class="btn btn-primary btn-large">Go to view 2</a> </div> </div> <div class="jumbotron" id="view2"> <div class="container"> <h1>Second panel</h1> <p>This is the second panel in line</p> <a href="view3" class="btn btn-primary btn-large">Go to view 3</a> </div> </div> <div class="jumbotron" id="view3"> <div class="container"> <h1>Third panel</h1> <p>This is the third panel in line</p> <a href="view4" class="btn btn-primary btn-large">Go to view 4</a> </div> </div> <div class="jumbotron" id="view4"> <div class="container"> <h1>Fourth panel</h1> <p>This is the Fourth panel in line. Click somewhere to go back to view 1 (except the link :-)</p> <a href="something" class="btn btn-primary btn-large">Do something</a> </div> </div> </div> </body> </html>