react-sticky-el
Sticky library for React.
Demos
Installation
npm install react-sticky-elOverview & Basic Example
The elements you actually want to "stick" should be wrapped in the <Sticky /> tag. The full list of props are available below, but typical usage will look something like so:
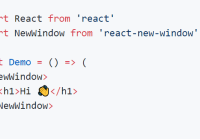
app.jsx
import React, {Component} from 'react'; import Sticky from 'react-sticky-el'; ... class App extends Component ({ render() { return ( ... <Sticky> <header> ... </header> </Sticky> ... ); }, }); This will be rendered as:
<div> <!-- holder element --> <div> <!-- wrapper element --> <header> ... </header> </div> </div>'Sticky' will be - wrapper element, holder element is used to reserve space in DOM when holder element has 'fixed' position.
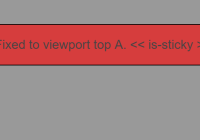
When the "stickiness" becomes activated, the following inline style rules are applied to the Sticky element:
position: fixed; top: 0; left: 0; width: <width that was before 'stickiness'>Note that the calculation of the Sticky element's height does not currently take margins into account. If you have margins on this element it may result in unexpected behavior.
<Sticky /> Props
mode (default: 'top')
'top' or 'bottom' - to which side element should stick
disabled (default: false)
Allows you to disable sticking by setting this prop to true
onFixedToggle (default: null)
This handler will be called right before changing fixed state.
wrapperCmp (default: 'div')
Anything that can be used by React.createElement. Used for wrapper element. If you want to use some custom component, please be sure that you don't lose style and className props.
holderCmp (default: 'div')
Anything that can be used by React.createElement. Used for holder element. If you want to use some custom component, please be sure that you don't lose style and className props.
holderProps (default: {})
These props will be used to create holderElement.
boundaryElement (default: null)
Selector to define a boundaryElement. It should be one of the parents of the current element.
Look at the Basic Demo for an example.
scrollElement (default: window)
Selector to define a scrollElement. All position checks will be performed according to this element, also it will be listened for 'scroll' event.
It should be one of the parents of the current element. Possible selectors: 'body', 'window', '#{id}', anything suitable for Element.matches.
Look at the Basic Demo for an example
app.jsx
import React, {Component} from 'react'; import Sticky from 'react-sticky-el'; ... class App extends Component ({ render() { return ( <div> <p>....</p> <div className="scrollarea" style={{height: '200px', overflow: 'scroll'}}> <Sticky scrollElement=".scrollarea"> <h1>Scroll pane</h1> </Sticky> </div> <p>....</p> </div> ); }, }); positionRecheckInterval (default: 0)
If your DOM structure is mutating (you are adding/removing elements), it will be usefull to provide positionRecheckInterval greater than zero, in this case position check will be also performed using setInterval in addition to scroll events.
stickyStyle (default: {})
In the event that you wish to override the style rules applied, simply pass in the style object as a prop:
app.jsx
<Sticky stickyStyle={customStyleObject}> <header /> </Sticky>Note: You likely want to avoid messing with the following attributes in your stickyStyle: left, top, and width.
stickyClassName (default: 'sticky')
You can also specify a class name to be applied when the element becomes sticky:
app.jsx
... <Sticky stickyClassName={customClassName}> <header /> </Sticky> ...topOffset (default: 0)
Sticky state will be triggered when the top of the element is topOffset pixels from the top of the scrollElement. Positive numbers give the impression of a lazy sticky state, whereas negative numbers are more eager in their attachment (check .
app.jsx
... <Sticky topOffset={80}> <SomeChild /> </Sticky> ...Look at the Basic Demo for an example
bottomOffset (default: 0)
Sticky state will be triggered when the bottom of the element is bottomOffset pixels from the bottom of the scrollElement.
app.jsx
... <Sticky bottomOffset={80}> <SomeChild /> </Sticky> ...Look at the Basic Demo for an example
hideOnBoundaryHit (default: true)
If false then boundaryEl should have position: relative. In this case sticky element won't disappear on reaching it's boundaries. A configuration like this is implemented below.
import Sticky from 'react-sticky-el'; ... <div className = "block" > <Sticky boundaryElement=".block" style = {{position: 'relative'}} hideOnBoundaryHit={false}> <SomeChild /> </Sticky> </div> ...Look at the Basic Demo for an example.
Other props
All other props (such as className, style, etc..) will be applyed to the holder element.
License
MIT