react-native-linear-gradient
A <LinearGradient> component for react-native, as seen in react-native-login.
Add it to your project
First, install it with npm install react-native-linear-gradient --save
Then you can try to link the project automatically:
$ react-native link react-native-linear-gradient
or do it manually as described below:
iOS
- Run
npm install react-native-linear-gradient --save
Then either:
Cocoapods
add the following line to your Podfile:
pod 'BVLinearGradient', :path => '../node_modules/react-native-linear-gradient'or:
Manually
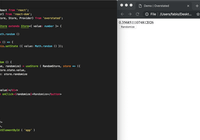
- Open your project in XCode, right click on
Librariesand clickAdd Files to "Your Project Name"Look undernode_modules/react-native-linear-gradientand addBVLinearGradient.xcodeproj. (Screenshot 1) (Screenshot 2). - Add
libBVLinearGradient.atoBuild Phases -> Link Binary With Libraries(Screenshot 1) (Screenshot 2). - Click on
BVLinearGradient.xcodeprojinLibrariesand go theBuild Settingstab. Double click the text to the right ofHeader Search Pathsand verify that it has$(SRCROOT)/../react-native/React- if it isn't, then add it. This is so XCode is able to find the headers that theBVLinearGradientsource files are referring to by pointing to the header files installed within thereact-nativenode_modulesdirectory. (Screenshot).
Then:
- Whenever you want to use it within React code now you can:
import LinearGradient from 'react-native-linear-gradient';
If you're having trouble, you can point your package.json at github to see if the issue has been fixed. Simply change the dependency
"react-native-linear-gradient": "react-native-community/react-native-linear-gradient",
to get the data right from github instead of npm and then npm install
For instance the podspec file does not contain the right data (author attributes etc..) in npm while it does in the github repo.
Android
- Run
npm install react-native-linear-gradient --save
Then:
- in
android/settings.gradle
... include ':react-native-linear-gradient' project(':react-native-linear-gradient').projectDir = new File(rootProject.projectDir, '../node_modules/react-native-linear-gradient/android') - in
android/app/build.gradleadd:
dependencies { ... implementation project(':react-native-linear-gradient') } - and finally, in
android/app/src/main/java/com/{YOUR_APP_NAME}/MainActivity.javafor react-native < 0.29, orandroid/app/src/main/java/com/{YOUR_APP_NAME}/MainApplication.javafor react-native >= 0.29 add:
//... import com.BV.LinearGradient.LinearGradientPackage; // <--- This! //... @Override protected List<ReactPackage> getPackages() { return Arrays.<ReactPackage>asList( new MainReactPackage(), new LinearGradientPackage() // <---- and This! ); }Windows (WPF)
-
in
windows/MyApp.slnAdd -> Existing Project:node_modules/react-native-linear-gradient/windows/LinearGradientWPF/LinearGradientWPF.csproj -
in
windows/MyApp/MyAppWPF/MyAppWPF.csprojAdd -> Reference -> LinearGradientWPF -
in
windows/MyApp/MyAppWPF/AppReactPage.csadd:using LinearGradient;and
public override List<IReactPackage> Packages => new List<IReactPackage> { ... new LinearGradientPackage() }Examples
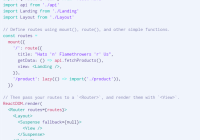
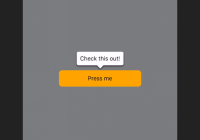
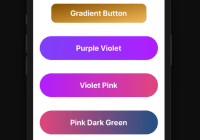
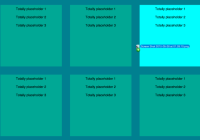
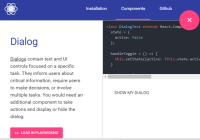
Simple
The following code will produce something like this:

import LinearGradient from 'react-native-linear-gradient'; // Within your render function <LinearGradient colors={['#4c669f', '#3b5998', '#192f6a']} style={styles.linearGradient}> <Text style={styles.buttonText}> Sign in with Facebook </Text> </LinearGradient> // Later on in your styles.. var styles = StyleSheet.create({ linearGradient: { flex: 1, paddingLeft: 15, paddingRight: 15, borderRadius: 5 }, buttonText: { fontSize: 18, fontFamily: 'Gill Sans', textAlign: 'center', margin: 10, color: '#ffffff', backgroundColor: 'transparent', }, });Horizontal gradient
Using the styles from above, set start and end like this to make the gradient go from left to right, instead of from top to bottom:
<LinearGradient start={{x: 0, y: 0}} end={{x: 1, y: 0}} colors={['#4c669f', '#3b5998', '#192f6a']} style={styles.linearGradient}> <Text style={styles.buttonText}> Sign in with Facebook </Text> </LinearGradient>Text gradient (iOS)
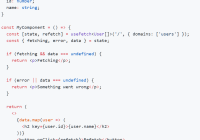
On iOS you can use the MaskedViewIOS to display text with a gradient. The trick here is to render the text twice; once for the mask, and once to let the gradient have the correct size (hence the opacity: 0):
<MaskedViewIOS maskElement={<Text style={styles.text} />}> <LinearGradient colors={['#f00', '#0f0']} start={{ x: 0, y: 0 }} end={{ x: 1, y: 0 }}> <Text style={[styles.text, { opacity: 0 }]} /> </LinearGradient> </MaskedViewIOS>Additional props
In addition to regular View props, you can also provide additional props to customize your gradient look:
colors
An array of at least two color values that represent gradient colors. Example: ['red', 'blue'] sets gradient from red to blue.
start
An optional object of the following type: { x: number, y: number }. Coordinates declare the position that the gradient starts at, as a fraction of the overall size of the gradient, starting from the top left corner. Example: { x: 0.1, y: 0.1 } means that the gradient will start 10% from the top and 10% from the left.
end
Same as start, but for the end of the gradient.
locations
An optional array of numbers defining the location of each gradient color stop, mapping to the color with the same index in colors prop. Example: [0.1, 0.75, 1] means that first color will take 0% - 10%, second color will take 10% - 75% and finally third color will occupy 75% - 100%.
<LinearGradient start={{x: 0.0, y: 0.25}} end={{x: 0.5, y: 1.0}} locations={[0,0.5,0.6]} colors={['#4c669f', '#3b5998', '#192f6a']} style={styles.linearGradient}> <Text style={styles.buttonText}> Sign in with Facebook </Text> </LinearGradient>
useAngle / angle / angleCenter
You may want to achieve an angled gradient effect, similar to those in image editors like Photoshop.
One issue is that you have to calculate the angle based on the view's size, which only happens asynchronously and will cause unwanted flickr.
In order to do that correctly you can set { useAngle: true, angle: 45, angleCenter: { x: 0.5, y: 0.5} }, to achieve a gradient with a 45 degrees angle, with its center positioned in the view's exact center.
useAngle is used to turn on/off angle based calculation (as opposed to start/end).
angle is the angle in degrees.
angleCenter is the center point of the angle (will control the weight and stretch of the gradient like it does in photoshop.
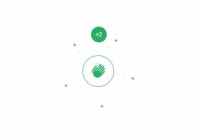
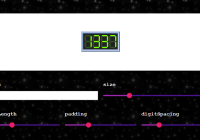
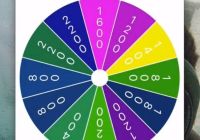
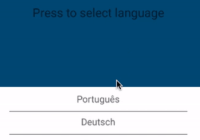
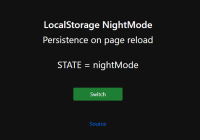
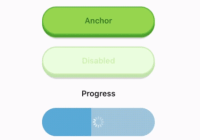
Updating the values for fun
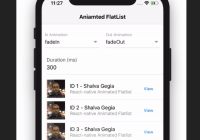
Check out Examples/AnimatedGradient (git clone this project, cd into it, npm install, open in XCode and run) to see how this is done:
This gif was created using licecap - a great piece of free OSS
An example app
You can see this component in action in brentvatne/react-native-login.
Other platforms
License
License is MIT