Faceted Taxonomy Browser Interface
Demo
http://pebbleroad.github.io/jquery-taxonomy-browser/build/
What it is
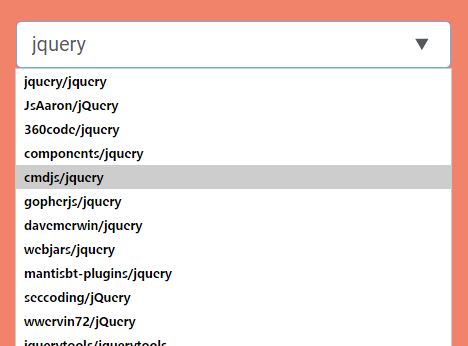
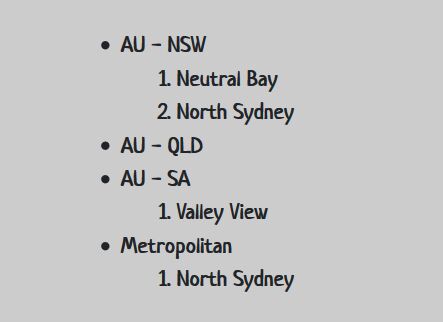
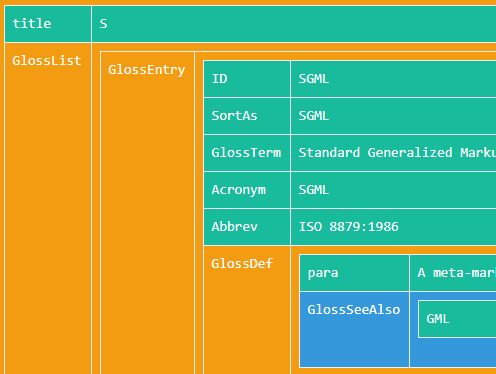
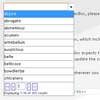
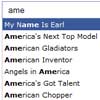
The jquery faceted taxonomy browser is a simple and intuitive design pattern for browsing hierarchical facets. It is based on a concept called ‘Miller Columns’. If you use the Mac OSX Finder application you can see this feature in action.
Why use it
It is becoming increasingly common to use a faceted taxonomy in organisations to manage large volumes of information. However, the facets and their categories can be quite wide and deep. This poses a challenge, especially to new staff, on learning the vocabulary quickly.
Alternate approaches to displaying the vocabulary, such as simple hierarchies, don't aid quick browsing (require using the back button) or are clunky (require scrolling).
The taxonomy browser solves these problems by
- being visible at all times (no page scrolling)
- allowing quick browsing—going back-and-forth is easy
How to use it
You can activate the plugin in two ways:
1. Add your taxonomy template before the closing body tag
<script type="text/x-handlebars-template" id="taxonomy_terms"> <div class="miller--terms--container"> {{#if parent}} <div class="miller--terms--selection"> {{#each parent}} {{#if @index}} » {{/if}} <a href="#" class="crumb" data-depth="{{depth}}">{{name}}</a> {{/each}} </div> {{/if}} <ul class="terms"> {{#each taxonomies}} <li class="term {{#if childrenCount}}has-children{{/if}}" data-id="{{id}}"> <a href="{{url}}"> <span class="title">{{label}}</span> <em class="icon icon-arrow"></em> <em class="icon icon-search" title="Search for {{label}}"></em> {{#if description}}<span class="description">{{description}}</span>{{/if}} </a> </li> {{/each}} </ul> </div> </script> 2. Data Source (html or JSON)
If you are using HTML lists
<!-- Miller container --> <div class="miller-container" data-source="html"> <ul> <li> <a href="http://url.to/taxonomy/item">Parent 1</a> <ul> <li><a href="#">Children - 1</a></li> <li><a href="#">Children - 2</a></li> <li><a href="#">Children - 3</a></li> <li><a href="#">Children - 4</a></li> <li> <a href="#">Children 5</a> <ul> <li><a href="#">Children 51</a></li> <li><a href="#">Children 52</a></li> <li><a href="#">Children 53</a></li> <li><a href="#">Children 54</a></li> <li><a href="#">Children 55</a></li> </ul> </li> </ul> </li> <li> <a href="http://url.to/taxonomy/item">Parent 2</a> <ul> <li><a href="#">Children - 12</a></li> <li><a href="#">Children - 22</a></li> <li><a href="#">Children - 32</a></li> <li><a href="#">Children - 42</a></li> <li> <a href="#">Children 520</a> <ul> <li><a href="#">Children 521</a></li> <li><a href="#">Children 522</a></li> <li><a href="#">Children 523</a></li> <li><a href="#">Children 524</a></li> <li><a href="#">Children 525</a></li> </ul> </li> </ul> </li> </ul> </div> If you are using json data
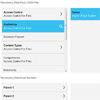
[ { "id": "documenttype", "label": "Access Control", "description": "Access Control for files", "url": "url", "slug": "category-slug", "parent": null }, { "id": "classified", "label": "Classified", "description": "Classified information only", "url": "#", "slug": "category-slug", "parent": "documenttype" }, { "id": "public", "label": "Public", "description": "Classified information only", "url": "#", "slug": "category-slug", "parent": "documenttype" }, { "id": "confidential", "label": "Confidential", "description": "Confidential information only", "url": "#", "slug": "category-slug", "parent": "classified" }, { "id": "secret", "label": "Secret", "description": "Secret information only", "url": "#", "slug": "category-slug", "parent": "classified" } ] Your html for json 'source' will look like:
<!-- Miller container --> <div class="miller-container" data-source="json" data-json='json/taxonomy.json'> </div> <!-- / Miller container --> 3. Initializing the plugin
<script src="//ajax.googleapis.com/ajax/libs/jquery/1/jquery.min.js"></script> <script src="scripts/handlebars.js"></script> <script src="scripts/jquery.taxonomyBrowser.js"></script> <!-- Optional for keyboard support --> <script src="scripts/jquery.taxonomyBrowser.keys.js"></script> <script> $(function(){ $('.miller-container').taxonomyBrowser(); }); </script> Available Plugin Options
$.taxonomyBrowser.defaultOptions = { source : 'json', /* Data Source: html | json */ json : 'json/taxonomy.json', /* JSON url */ rootvalue : null, /* Root Taxonomies have a parent value of null */ columnclass : '.miller--column', /* Class of each miller column */ columns : 3, /* Number of columns */ columnheight : 400, /* Height of each column */ start : '', /* ID of the starting taxonomy item. Default : null */ template : 'taxonomy_terms' /* Handlebars template id */ }; You can even add data-*option* attributes to your html