React State Transitions
Version 2.1.0.
Provides a set of components to animate between elements when the view re-renders. Pretty much any method of view handling should work, and the demo uses ReactRouter.
View the demos before reading to get a gist of what animations you'll get.
npm install --save state-transitions const React = require('react'); const { TweenState, AnimateInOut } = require('state-transitions');Tween State
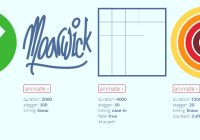
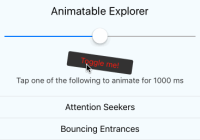
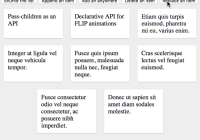
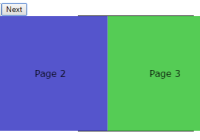
Morphs elements from the previous to the next view (the main animation you see in the picture). It does this by comparing all TweenState components removed and added in a view re-render, and animating between the TweenState elements that have the same id property.
class AnimateFrom extends React.Component { render() { return ( <TweenState id='animate-me'> <div> Animate me! </div> </TweenState> ); } }; class AnimateTo extends React.Component { render() { return ( <TweenState id='animate-me' duration={ 0.6 } timingFunction='ease-in-out' delay={ 0 }> <div> I was animated! </div> </TweenState> ); } };Only one element from each before and after the view re-render can contain the same id, and will throw an error if violated.
There are the following optional arguments are also available.
| Property | Default |
|---|---|
| duration | 0.6 |
| timingFunction | 'ease-in-out' |
| delay | 0 |
Should the final element update itself during the animation, it is possible to fade out to the updated element using the following properties. Setting fadeOutDuration to something greater than zero will enable this functionality.
| Property | Default |
|---|---|
| fadeOutDuration | 0 |
| fadeOutTimingFunction | 'ease-in' |
| fadeOutDelay | 0 |
When using TweenState, the entire element including subelements is copied, so it will look identical during the transition.
It is possible to nest TweenState components, with all components animating, and child TweenState components will be hidden from their parents so you don't see duplicate elements.
Should you need to, you can target elements tweening to and from via the classnames tween-state-animating tween-state-animating-to and tween-state-animating tween-state-animating-from. These can be overridden with the properties animateToClassName and animateFromClassName, respectively.
Animate In Out
Adds transition in and transition out animations to a single element. Different from ReactCSSTransitionGroup in that it is designed for the one element, and not with inserting and removing child nodes.
Your child element should by default have its own entrance animation CSS property so it is animated in when mounted, and have a leaving animation when it contains the class name leaving.
class Component extends React.Component { render() { return ( <AnimateInOut> <div className='fade'> I was transitioned! </div> </AnimateInOut> ); } }.fade { -webkit-animation: 1s fade-in; animation: 1s fade-in; } .fade.leaving { -webkit-animation: 1s fade-out; animation: 1s fade-out; } /* Keyframe definitions */ @keyframes fade-in { 0% { opacity: 0 } 100% { opacity: 1 } } @-webkit-keyframes fade-in { 0% { opacity: 0 } 100% { opacity: 1 } } @keyframes fade-out { 0% { opacity: 1 } 100% { opacity: 0 } } @-webkit-keyframes fade-out { 0% { opacity: 1 } 100% { opacity: 0 } }It is possible to modify the className using the animateOutClassName property.
This element can contain TweenState components as children. In this case, the TweenState children will only be animated once using only the TweenState animation. They are removed from the AnimateInOut animation to avoid duplicates.
If you are using this for animating pages in and out—and you do not want to use TweenState—this component should wrap each page individually (each page component should match the first example). Alternatively, if you want every page to be wrapped implicitly, and lose the ability to individually adjust transitions, the following (hack) will work for React Router:
class MainRouteComponent extends React.Component { render() { return ( <AnimateInOut key={ this.props.route.path }> <div> { this.props.children } </div> </AnimateInOut> ); } }Notes
- Both these components will introduce extra elements into your
<body />only for the duration of the transition- They will not affect your React DOM, and the
data-_react-ids are stripped to ensure this
- They will not affect your React DOM, and the
- Both components accept only one child, and will throw an error if more children are added
- The child element can contain multiple children as usual
Z-Indexes
For both these components, the duplicates are placed in a container element in the body. This has some unfortunate effects on z-indexes. It's out of the scope of this readme to explain z-indexes, but make sure you know how they work before reading on. (mainly know they're not global for the document).
If you always want an element to appear on top of another (like the modal in the dinosaur boutique example), you can set the z-index on the modal to something positive. However, when tweening, this will make the modal always appear over the top of the thing it's tweening between. To fix this, you'll have to adjust the z-indexes for all elements involved using the
An example of z-index conflicts can occur when transitioning to element B, with both contained in element C, where C is a positioning context. In the case of element A and B having z-index: 1, and C z-index: 10, in normal layout, elements A and B would show above C. However, during the transition, elements A and B will be placed in the body. Since they have a lower z-index than C, C will overlap. However, if we set A and B to have z-index: 11, the normal layout is unaffected. However, when transitioning, they will have a higher z-index than C, and show above it (as intended).
Issues with Webpack
If this library is not working, it's very probable that webpack is trying to include the react library twice. If this is the case, add the following to your webpack.config.js,
resolve: { alias: { 'react': path.resolve('./node_modules/react'), 'react-dom': path.resolve('./node_modules/react-dom'), }, },Browser Support
You can use this library in any browser, and it will disable itself if any of the following conditions are not met.
- The browser supports
transition - The browser supports
animationor-webkit-animation
Tested in
- Safari 8 and 9
- Chrome 40+
- Firefox 38+
If you get the chance to test in more browsers, please update this or file issues. Thanks!
Dependencies
- react 0.14+
- react-dom 0.14+
- lodash 3.10+
- events (from Node)


