I Can't Believe It's a Control!
jquery-icbiacontrol is a jQuery plugin that helps you style native browser controls, but not really.
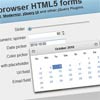
See the plugin page for the demo.
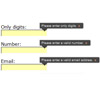
It works by adding custom, styleable markup to the DOM right next to the original control, which is then made transparent and positioned on top of your custom widget. That way, when you interact with the styled widget, you're actually interacting with the native browser control.
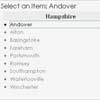
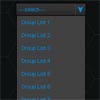
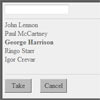
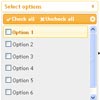
For example, when you use the plugin with a select box, you style only the "display" part. When the widget is engaged, the normal browser dropdown is shown. iOS will show its little scrolly wheel thing; desktop browsers will show the native dropdown list.
Currently, jquery-icbiacontrol works with the following elements:
- select
- input[type=checkbox]
- input[type=radio]
- input[type=file]
Usage
$('select').icbiaControl();The orignal control will be wrapped in a container with the classes "icbiacontrol" and "icbia", along with a styleable widget (see below for the default widget markup for each supported control type). Use CSS to style the widget however you want. When the element has focus, a class of "focus" will be added to the container (the element with the "icbiacontrol" class).
Options
Options can be passed either in an object when you initialize the plugin, or by setting prefixed data-* attributes on the select box you're replacing. (For example, if you want to set the option "widgetTemplate", you would use the attribute "data-icbiacontrol-widgetTemplate". "data-widgetTemplate" and "data-widgettemplate" are also valid.)
widgetTemplate
Used if you aren't happy with the default widget markup icbiacontrol produces. Can be either a function that returns a jQuery object or a selector that will be used to find a template in the document. The classes "icbiacontrol-widget" and "icbia-widget" will be automatically added to your element.
Example
<script id="icbiaselect-template" type="text/html"> <div> <div class="icbiaselect-display"></div> <div>CLICK ME!</div> </div> </script> <script type="text/javascript"> $('select').icbiaControl({widgetTemplate: '#icbiaselect-template'}); </script>Supported Controls
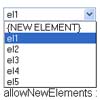
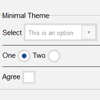
select
Default Widget Template
<span class="icbiacontrol-widget icbiaselect-widget"> <span class="icbiaselect-display-wrapper"> <span class="icbiaselect-display"></span> </span> <span class="icbiaselect-arrow"><i></i></span> </span>Note: If providing a custom widget template, make sure it includes an element with the class "icbiaselect-display". The plugin will use this to show the selected label.
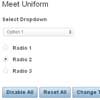
checkbox & radio
Default Widget Template
<span class="icbiacontrol-widget icbiacheckbox-widget"><i></i></span> <span class="icbiacontrol-widget icbiaradio-widget"><i></i></span>The classes "checked" and "unchecked" will be added to the container (the element with the "icbiacheckbox" class) to inidicate the current state of the control.
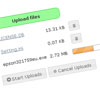
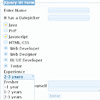
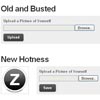
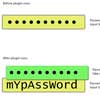
file upload
Default Widget Template
<span> <span class="icbiafile-display-wrapper"> <span class="icbiafile-display"></span> </span> <span class="icbiafile-uploadbutton"> <i></i> <span class="icbiafile-buttontext"></span> </span> </span>Note: If providing a custom widget template, make sure it includes an element with the class "icbiafile-display". The plugin will use this to show the selected file name.
The classes "empty" and "populated" will be added to the container, (the element with the "icbiafile" class).
Customizing Text
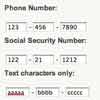
Both the input's default text and button text can be changed using 'data-' attributes on the input itself.
| Element | Attribute | Default |
|---|---|---|
| Default/Empty Text | data-emptyText | No File Chosen |
| Upload Button Text | data-buttonText | Choose File(s) |