flexLayout
Easy to use, highly customizable, light weight, jQuery split/layout plugin.
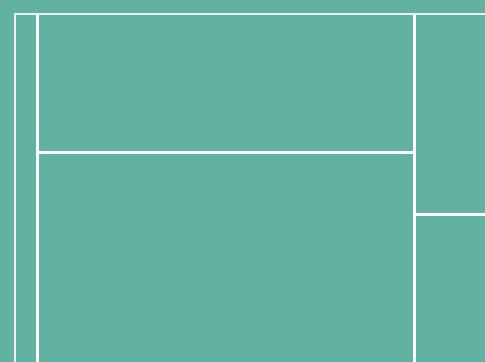
Refer to the flexLayout website for examples.
Features
- Easy to use -- simple configurations.
- Highly customizable -- easy configuration for every nested layer and use your own attributes and styles.
- Resizable -- individually resizable and whole block resizable.
- Easy to use with Backbone -- just assign el with generated layouts.
- Work on all major browsers -- implemented with flexboxes.
- Lightweight -- about 1kb when gzipped.
How it works
$('some-element').flexlayout([layoutConfig], {options} );Note: 'some-element's parent must have height and width(i.e. height and width cannot be 0). Or you need to specify height and width for 'some-element' in the [options].
layoutConfig
- Describe your layout configuration by using an array, in which every element describes a block of the layout.
layout1 = ['1', '3', '5']; layout2 = ['100px', '1', '5', '10em'];layout1:
- The width/height ratio of the three blocks is 1:3:5 according the parent block's width/height respectively.
layout2:
- The width/height of the first and the last block are fixed '100px' and '10em'.
- The width/height of the second and the third block have a ratio of 1:5. Such layout means the plugin will first take out the width/height of the first two blocks and then divide the rest blocks accordingly.
Give it a direction('dir') to spcifiy you want to divide Horizontally('h') or Vertically('v'). Then you are good to go.
/* Default direction is horizontal('h') */ $('#some-div-1').flexlayout(['1', '3', '5'], {dir: 'v'}); $('.some-div-2').flexlayout(['100px', '1', '5', '10em']);/*use default options*/$some-div-1:
- It will be divided vertically into three blocks with width 1:3:5.
$some-div-2:
- It will be divided horizontally into four blocks with height accordingly.
- Give attributes to the blocks, simply by separate attributes and dimension with ':'.
layout1 = ['1:id="left"', '3:class="center" data-XXX="some-prop"', '5']; layout2 = ['100px:#top', '1:#middle .bg-blue', '5', '10em:.bottom .invisible'];layout1:
- You can use html inline style to give attributes to the blocks.
layout2:
- You can also use jQuery selector style to give attributes to the blocks(limited to ids and classes).
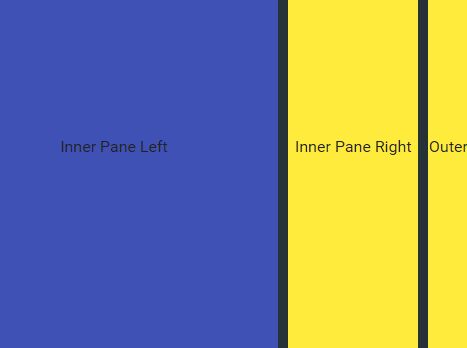
- Nested layout configurations.
If you want to configure a nested layout, simply describe the blocks contains nested layouts with an array.
-
[ '...', [ '...', '...' ] ]
-
The first element represents the configuration of the block itself.
-
The second element, an array, represents the configuration of the nested layouts inside the block.
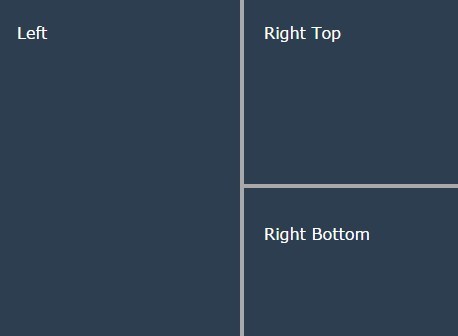
var layout3 = [ '80px:.banner', ['1:.content', ['2:.conent #content-left', '5:.content .right']] ]; $(body).flexlayout(layout3); //the preceding code has same effect as the following $(body).flexlayout(['80px:.banner', '1:.content']); $('.content').flexlayout(['2:.conent #content-left', '5:.content .right'], {dir: 'v'}); layout3:
- Firstly, divide body into a fixed height banner, and a flexible height content block.
- Secondly, the content block is then divided into a left and a right block with width ratio 2:5.
- Note: To specify the directions on nested layout, please check options section.
[options]
//Default options options: { /*defines the height of the requesting block; '...string...'*/ height: '100%', /*defines the width of the requesting block '...string...'*/ width: '100%', /*defines the direction of the layout; 'h', 'v' or ['h', 'v', 'v', ...]*/ dir: 'h', /*defines whether the width/height of created blocks can be adjusted or not, boolean or [boolean, boolean]*/ adjust: false, /*defines the style of divide bars between created blocks, {...css object}, '...string of class name...', boolean or [..., ..., ..., ...]*/ bars: {flex: '0 0 1px', 'background-color': '#ddd'} }-
height: 'string'
- Defines the height of the requesting element, the default value is '100%'.
- If requesting element's parent does NOT have height(i.e. height = 0), you must specify a height here, otherwise the plugin will not perform correctly.
- If requesting element's parent have a height, you could just leave it as default value, since it will expand by it self.
-
width: 'string'
- Defines the width of the requesting element, the default value is '100%'.
- If requesting element's parent does NOT have width(i.e. width = 0), you must specify a width here, otherwise the plugin will not perform correctly.
- If requesting element's parent have a width, you could just leave it as default value, since it will expand by it self.
For example:
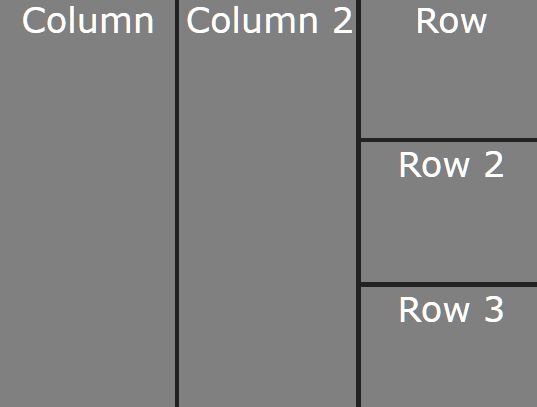
<div id="parent" style="height:600px; width:400px;"> <div id="some-element"></div> </div> <script> $('#some-element').flexlayout(['1:#some-left', '5:#some-right']); </script> or <div id="parent"> <div id="some-element"></div> </div> <script> $('#some-element').flexlayout(['1:#some-left', '5:#some-right'], { height: '600px', width: '400px' }); </script> - dir: 'h' or 'v' or [array of 'h's & 'v's]
- Defines the direction of layout. 'h' means horizontally and 'v' means vertically. The default value is 'h'.
- For nested layout:
- If only given 'h' or 'v', then for every nested level, the direction will be swtiched automatically.
- If given array, then every nth level will honor the direction given by the nth element in the array.
- If the length of given array is less than the number of levels, default option will be filled to the array.
For example:
//vertical layout then hortizontal layout var vh = [ '1:.left', ['2:.right', ['1:.right-top', '5:.right-bottom']] ]; $('some-element').flexlayout(vh, {dir: 'v'}); //always divide vertically var vv = [ '1:.left', ['2:.right', ['1:.right-left', '5:.right-right']] ]; $('some-element').flexlayout(vv, {dir: ['v', 'v']}); -
bars: {...css object...}, '...string of class name...', false or [array of combinations]
- Defines whether the generated layout blocks have bars between them, and the style of such bars. The default value is, {flex: '0 0 1px', 'background-color': '#ddd'}
- If given false, then blocks will not have bars between them.
- If given 'string', it will be considered as bar class names. You can tune the styles of bars by selecting such class names in the css file.
- If given {object}, it will be considered as a CSS style object. Those style will be inserted into corresponding DOM element as inline styles.
- Note: since the plugin is based on flexbox, you do not need to specify height or width for the bars. Simply write {flex: 0 0 Xpx, ...other styles...}. In the horizontal layouts, it is considered as bars Xpx height and width 100%. Similarly in vertical layouts, it is considered as bars Xpx width and height 100%
- If given array, then every nth level will honor the 'bars' configuration given by the nth element in the array.
-
adjust: false or true or [array of booleans]
- Defines whether the height/width of generated layout can be adjusted or not. The default value is, false
- If given false, then the generated layout cannot be adjusted.
- If given true, then there will bars insert between generated blocks. The style of bars honors the 'bars' configuration. Drag bars can adjust height/width of the blocks.
- If given array, then every nth level will honor the 'adjust' configuration given by the nth element in the array.
- Note: if 'adjust' is true, and 'bars' is false. The 'bars' configuration will be overwritten by default value.