Syntaxy JS
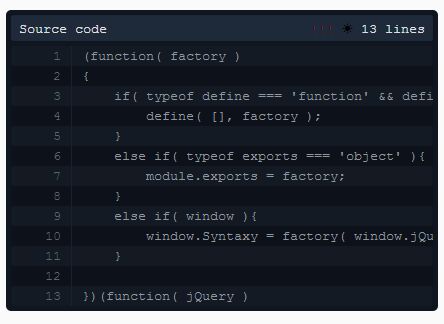
Syntaxy is a small and flexible syntax highlighter for the web. It uses one common theme file for all syntax languages to make it easier to customize the appearance to fit your theme. It has no dependencies out of the box, but can be used as a jQuery plugin, if you already have it loaded on your site.
Syntaxy Demo & Documentation Page
..
Quick Usage Guide
Start by getting the Syntaxy CSS an JS files added to the page:
<link rel="stylesheet" href="syntaxy.theme.min.css" /> ... <pre id="codebox" data-type="default"> // some code here to highlight. // default is the name of the filter that will be used to highlight. // see more info on using filters below. </pre> ... <script src="syntaxy.min.js"></script>Using Syntaxy with Pure JS.
Here's how to get syntax highlighted on a container using a new Syntaxy instance. You need to call render() on the instance, this allows for customizing filters for this instance before doing final markup render.
<script type="text/javascript"> var options = {}; var codebox = document.getElementById( 'codebox' ); var syntaxy = new Syntaxy( codebox, options ); // add custom filters, modify options, etc. then... syntaxy.render(); </script>Using Syntaxy with jQuery.
Here's how to get syntax highlighted on a container using jQuery, if available. The jQuery plugin function calls render() on a new Syntaxy instance for matched elements, so customizing filter when using Syntaxy with jQuery is currently not possible.
<script type="text/javascript"> var options = {}; $( '#codebox' ).syntaxy( options ); </script>Passing Options to Syntaxy
There are different ways to pass options to Syntaxy, one way is to pass it to the Syntaxy constructor during instantiation, or using the setOptions( options ); method.
Another way is to pass options to Syntaxy is by using data attributes on the target element that holds the code to be highlighted. Note that only some options can be passed using data attributes, see the options table below for more info.
Options Table
...
| JS Option | Attribute | Type | Default | Description |
|---|---|---|---|---|
| tagOpen | n/a | String | « | Special wrapping tag opening delimiter used by Syntaxy before rendering to final HTML markup. |
| tagSplit | n/a | String | ≈ | Special wrapping tag split delimiter used by Syntaxy before rendering to final HTML markup. |
| tagClose | n/a | String | » | Special wrapping tag closing delimiter used by Syntaxy before rendering to final HTML markup. |
| tagName | n/a | String | span | The name/type of HTML markup tags used for individual highlighted words during final render. |
| classPrefix | n/a | String | stx- | CSS class name prefix for Syntaxy related theme, colors and container markup code. |
| codeTitle | data-title | String | Source code | Title string to go on the top header bar of rendered Syntaxy code containers. |
| codeType | data-type | String | blank | This refers to the name of the initial RegExp filter to be used for highlighting specific code types. |
| minHeight | data-min-height | String | 100px | A CSS size value to be used as the minimum height allowed for Syntaxy code containers. |
| maxHeight | data-max-height | String | 600px | A CSS size value to be used as the maximum height allowed for Syntaxy code containers. |
| isInline | data-inline | Mixed | false | A boolean-like value to specify if the code container is an in-line element (span, etc), or block-type element. |
| wordWrap | data-wrap | Mixed | false | A boolean-like value to specify if long code lines should be wrapped or remain on a single line (h-scroll). |
| startLine | data-start | Int | 1 | A number that specifies what line number to start counting up from. |
| debugLines | data-debug | String | blank | A comma-separated list of line numbers to flash/highlight, used to bring attention to specific lines. |
Using Custom Filters
You can create your own Regular Expression filters (functions) that extend the built-in Syntaxy filters. Start by setting the data-type attribute of your container to the name of your custom filter:
<pre class="syntaxy" data-type="myfilter"> // code to highlight using myfilter... foo( bar ); </pre>The addFilter( name, filter ) method takes the name of your custom filter and a function that is executed in the scope of the Syntaxy class, giving you access to other methods to use. This function takes the entire code from the target container as a string and expects you to return it back out after applying your changes.
syntaxy.addFilter( 'myfilter', function( code ) { // custom code modifications for this filter code = code.replace( /(foo)/g, this.wrapClass( 'function', '$1' ) ); code = code.replace( /(bar)/g, this.wrapClass( 'keyword', '$1' ) ); // apply some filters already added code = this.applyFilter( 'strings', code ); code = this.applyFilter( 'comments', code ); return code; });The wrapClass( class, code, strip, multiline ) method is used to wrap something, like the resulting match of a regular expression in a class that corresponds with the color (CSS theme) to be applied (highlight). This method takes the name of the CSS class (without prefix, see options), the content to be wrapped and two other boolean options, and returns the content wrapped in special tags with the defined class name.
You can use a filter that has been added to, or comes with Syntaxy by using the applyFilter( name, code ) method. This method takes the name of the filter to be used, the code string, and passes it through the filter's callback function, as described above.
Building Syntaxy
Syntaxy already comes with a few themes compiled and ready to go out of the box, but you can also build your own themes from the included source files in the /src folder.
You will need Node JS installed and be familiar with using Gulp tasks to build and minify both the CSS and Javascript code. Here's a few examples of how to use the included Gulp tasks to build Syntaxy.
// get the dependencies installed $ npm install // build and minify just the CSS to /dist $ gulp build_css // build and minify just the JS to /dist $ gulp build_js // build and minify both JS and CSS to /dist $ gulp build // watch both JS and CSS for changes and build both $ gulp watchBuild output (JS/CSS) can be found in the /dist folder.
Author
Rainner Lins: @raintek_
License
Licensed under MIT.
