LVL99 Nice Screen
jQuery plugin which enables app-like animated transitions between screens.
Author Matt Scheurich <[email protected]>
Demos:
- Basic features: https://codepen.io/lvl99/pen/GOEozV
- Simple example of screen transition types: https://codepen.io/lvl99/pen/JOJGmZ
Features
- Total reliance on CSS for animations and rendering (no JS or
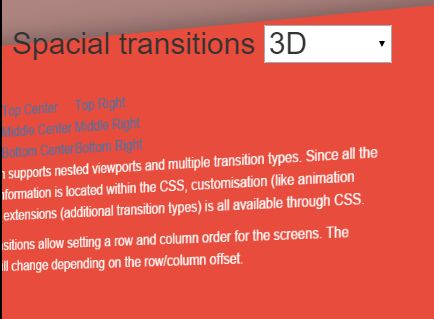
jQuery.animateused) - Spacial transitions: move between screens in directions left, right, up and down depending on row/column values
- Supports multiple & nested viewports
- Plenty of jQuery custom events to hook into; can be used in conjunction with AJAX to pull external files into new screens and manage memory when dealing with many screens
Installation
Download the jquery-lvl99-nicescreen.js and jquery-lvl99-nicescreen.css files and add them to your site.
Instantiate the Nice Screen functionality by using $(elem).nicescreen(); within your JavaScript.
Usage
Define a viewport (screen container) with the ui-nicescreen-viewport CSS class. Default options for child screens can be set within special data-nicescreen attributes on the viewport.
Define screens with the ui-nicescreen CSS class. Ensure you use unique id attributes for each individual screen. Options per each screen can be set within special data-nicescreen attributes.
<div class="ui-nicescreen-viewport" data-nicescreen-group="default"> <div id="intro" class="ui-nicescreen" data-nicescreen-column="1"> <h2>Introduction</h2> <p>Hello, world!</p> </div> <div id="about" class="ui-nicescreen" data-nicescreen-column="2"> <h2>About</h2> <p>This is an example of Nice Screen's functionality</p> </div> </div>Apply the Nice Screen JavaScript functionality to each screen:
<script type="text/javascript"> jQuery(document).ready( function ($) { $('.ui-nicescreen').nicescreen(); }); </script>You can overwrite set data-nicescreen HTML attribute values by passing an object within Nice Screen's JS call:
$('.ui-nicescreen').nicescreen({ group: 'example' });Plugin options
Nice Screen plugin options can be set before and after any screens have been instantiated.
| Option | Type | Default | Description |
|---|---|---|---|
allowHashChange | {Boolean} | true | Enable/disable default hashchange event which shows referenced screen by #ID |
allowResizeRefresh | {Boolean} | true | Enable/disable the refresh event on window resize |
checkResizingTime | {Number} | 150 | The time in milliseconds to trigger the resize refresh event |
persistentRefresh | {Boolean} | false | Enable/disable the refresh event on timed interval |
persistentRefreshTime | {Number} | 6000 | The time in milliseconds to trigger the refresh event |
defaults | {Object} | {...} | The default screen options (See Instance Options) |
$(document).ready( function () { lvl99.nicescreen.options = { allowHashChange: true, allowResizeRefresh: true, checkResizingTime: 150, persistentRefresh: false, persistentRefreshTime: 6000, defaults: { group: 'default', column: 0, row: 0 } } });Instance options
The options set per screen instance. If not set, will default to the value of lvl99.nicescreen.options.defaults.
| Option | Type | Default | Description |
|---|---|---|---|
group | {String} | default | The name of a group you wish to assign the screen to |
column | {Number} | 0 | The number of the screen's column order. Can take positive and negative values |
row | {Number} | 0 | The number of the screen's row order. Can take positive and negative values |
Options assignment
Instance options can be set/assigned:
- On the viewport HTML element using
data-nicescreenattributes (child screens will inherit from the parent viewport — see HTML Attribute options for more info) - On the screen HTML element using
data-nicescreenattributes (see HTML Attribute options for more info) - When initialising the Nice Screen instance to an element using JavaScript/jQuery
var screenOptions = { group: 'default', column: 0, row: 0 }; // Set via jQuery $('.ui-nicescreen').nicescreen(screenOptions); // You can set via regular JavaScript var elem = document.getElementById('screen'); var screen = new NiceScreen(elem, screenOptions);HTML Attribute options
In conjunction with the Instance options there are a few extra options which can be set on the HTML element itself. These affect the transition styles and animation more than anything else.
| Option attribute | Type | Default | Description |
|---|---|---|---|
data-nicescreen-transition | {String} | Empty | The type of transition animation. Can be slide, 3d or card. Use this field to set custom transition animations in the CSS, otherwise use CSS classes. |
Instance methods
Each element's Nice Screen instance (lvl99.nicescreen.NiceScreen, elem.nicescreen) has a few methods available (which can also be triggered with jQuery on the element itself).
With some events there are extra events triggered, which you can hook into.
NiceScreen.refresh
Refreshes the viewport's dimensions.
elem.nicescreen.refresh()
$(elem).trigger('event-nicescreen-refresh')
Triggered event chain:
event-nicescreen-set-dimensions=>( viewport {HTMLElement}, width {Number}, height {Number} )
NiceScreen.show
Show screen without the transition animation.
elem.nicescreen.show()
$(elem).trigger('event-nicescreen-show')
Triggered event chain:
event-nicescreen-show-startevent-nicescreen-hideevent-nicescreen-show-end
NiceScreen.hide
Removes the .ui-nicescreen-active class from the element, effectively hiding the screen (only if it's not currently transitioning/animating).
elem.nicescreen.hide()
$(elem).trigger('event-nicescreen-hide')
Triggered event chain:
event-nicescreen-hide-startevent-nicescreen-hide-end
NiceScreen.reveal
Transitions out the viewport's active/visible screen and then reveals the new screen.
elem.nicescreen.reveal()
$(elem).trigger('event-nicescreen-reveal')
Triggered event chain:
event-nicescreen-transition-startevent-nicescreen-showevent-nicescreen-enter-startevent-nicescreen-enter-endevent-nicescreen-exit-startevent-nicescreen-exit-endevent-nicescreen-transition-end
NiceScreen.destroy
Removes the Nice Screen instance on the HTML object. Useful for memory management.
elem.nicescreen.destroy()
$(elem).trigger('event-nicescreen-destroy')
Transition animations
Creating a new transition is easy, provided you are familiar with CSS3.
Nice Screen supports up to 4 enter animations and 4 exit animations:
.ui-nicescreen-animation-enterfromleft.ui-nicescreen-animation-enterfromright.ui-nicescreen-animation-enterfromtop.ui-nicescreen-animation-enterfrombottom.ui-nicescreen-animation-exittoleft.ui-nicescreen-animation-exittoright.ui-nicescreen-animation-exittotop.ui-nicescreen-animation-exittobottom
The default transition is 'slide'. It's advised you use SASS/LESS/Stylus to construct new animations, and utilise some form of autoprefixer post-processing script to automate the drudgery of supporting various browser/vendor prefixes.
/* Default animation properties */ .ui-nicescreen-animation { z-index: 2; animation-delay: 0; animation-direction: normal; animation-duration: 0.5s; animation-iteration-count: 1; animation-timing-function: ease-in-out; } /* Default transition animations */ .ui-nicescreen-animation-enterfromleft { animation-name: enterfromleft; } .ui-nicescreen-animation-enterfromright { animation-name: enterfromright; } .ui-nicescreen-animation-enterfromtop { animation-name: enterfromtop; } .ui-nicescreen-animation-enterfrombottom { animation-name: enterfrombottom; } .ui-nicescreen-animation-exittoleft { animation-name: exittoleft; } .ui-nicescreen-animation-exittoright { animation-name: exittoright; } .ui-nicescreen-animation-exittotop { animation-name: exittotop; } .ui-nicescreen-animation-exittobottom { animation-name: exittobottom; } @keyframes enterfromleft { 0% { transform: translateX(-100%); } 100% { transform: translateX(0); } } @keyframes enterfromright { 0% { transform: translateX(100%); } 100% { transform: translateX(0); } } @keyframes enterfromtop { 0% { transform: translateY(-100%); } 100% { transform: translateY(0); } } @keyframes enterfrombottom { 0% { transform: translateY(100%); } 100% { transform: translateY(0); } } @keyframes exittoleft { 0% { transform: translateX(0); } 100% { transform: translateX(-100%); } } @keyframes exittoright { 0% { transform: translateX(0); } 100% { transform: translateX(100%); } } @keyframes exittotop { 0% { transform: translateY(0); } 100% { transform: translateY(-100%); } } @keyframes exittobottom { 0% { transform: translateY(0); } 100% { transform: translateY(100%); } }Issues
- Only browser that all three transitions render correctly in is Google Canary
