pagePiling.js

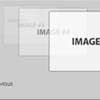
Pile your sections one over another and access them scrolling or by URL!
Customizations of the plugin available upon request for some reasonable price. Contact me.
Would you like to have a website using pilePage.js functionality but you don't know how to use it? I can do it for you for a reasonable price. Contact me.
Introduction
Suggestion are more than welcome, not only for feature requests but also for coding style improvements. Let's make this a great plugin to make people's lives easier!
Compatibility
pagePiling.js is fully functional on all modern browsers, as well as some old ones such as Internet Explorer 8, 9, Opera 12, etc. It works with browsers with CSS3 support and with the ones which don't have it, making it ideal for old browsers compatibility.
It is also designed to work on touch devices such as mobile phones or tablets.
Special thanks to Browserstack for supporting pagePiling.js.
Usage
As you can see in the example files, you will need to include the JavaScript file jquery.pagepiling.js (or the minified version jquery.pagepiling.min.js) and the css file jquery.pagepiling.css of the plugin, as well as jQuery. Optionally, you can add the jQuery UI library in case you want to use other easing effects apart from the ones included in the jQuery library which are the linear or swing effects.
Install using bower:
Optionally, you can install pagePiling.js with bower: Terminal:
bower install pagepiling.jsIncluding files:
<link rel="stylesheet" type="text/css" href="jquery.pagepiling.css" /> <script src="http://ajax.googleapis.com/ajax/libs/jquery/1.11.1/jquery.min.js"></script> <script type="text/javascript" src="jquery.pagepiling.js"></script>Optional use of CDN
If you prefer to use a CDN to load the needed files, pagePiling.js is in CDNJS: https://cdnjs.com/libraries/pagePiling.js
Required HTML structure
Each section will be defined with a div containing the section class. The active section by default will be the first section, which is taken as the home page.
<div id="pagepiling"> <div class="section">Some section</div> <div class="section">Some section</div> <div class="section">Some section</div> <div class="section">Some section</div> </div>Initialization
All you need to do is call the plugin inside a $(document).ready function:
$(document).ready(function() { $('#pagepiling').pagepiling(); });A more complex initialization with all options set could look like this:
$(document).ready(function() { $('#pagepiling').pagepiling({ menu: null, direction: 'vertical', verticalCentered: true, sectionsColor: [], anchors: [], scrollingSpeed: 700, easing: 'swing', loopBottom: false, loopTop: false, css3: true, navigation: { 'textColor': '#000', 'bulletsColor': '#000', 'position': 'right', 'tooltips': ['section1', 'section2', 'section3', 'section4'] }, normalScrollElements: null, normalScrollElementTouchThreshold: 5, touchSensitivity: 5, keyboardScrolling: true, sectionSelector: '.section', animateAnchor: false, //events onLeave: function(index, nextIndex, direction){}, afterLoad: function(anchorLink, index){}, afterRender: function(){}, }); });Accesing sections
In order to create links to a certain section, you can use a normal URL link if you are using pagePiling.js with anchor links (using the anchors option), then you will be able to use anchor links also to navigate directly to a certain section. For example: http://alvarotrigo.com/pagePiling/#page2
Be careful! data-anchor tags can not have the same value as any ID element on the site (or NAME element for IE).
Using a menu
To link the menu with the active section you will have to use the menu option and make use of anchor links (#) as explained below in the options section.
Creating a scrollable section
In case you want to have a section with large content and therefore create an scroll bar for that section, you can do it by adding the class pp-scrollable to that section:
<div class="section pp-scrollable"></div>Options
-
verticalCentered: (defaulttrue) Vertically centering of the content within sections. -
scrollingSpeed: (default700) Speed in milliseconds for the scrolling transitions. -
sectionsColor:(defaultnone) Define the CSSbackground-colorproperty for each section: Example:
$('#pagepiling').pagepiling({ sectionsColor: ['#f2f2f2', '#4BBFC3', '#7BAABE', 'whitesmoke', '#000'], });anchors: (default[]) Defines the anchor links (#example) to be shown on the URL for each section. Using anchors forward and backward navigation will also be possible through the browser. This option also allows users to bookmark a specific section. Be careful! if you use anchors, they can not have the same value as any ID element on the site (or NAME element for IE).
Important It is helpful to understand that the values in the anchors option array correlate directly to the element with the class of .section by it's position in the markup.
-
easing: (defaultswing) Defines the transition effect to use for the vertical scrolling. It requires jQuery UI in order to use any other transition other thanswingandlinear. Other libraries could be used instead. -
loopTop: (defaultfalse) Defines whether scrolling up in the first section should scroll to the last one or not. -
loopBottom: (defaultfalse) Defines whether scrolling down in the last section should scroll to the first one or not. -
css3: (defaulttrue). Defines wheter to use JavaScript or CSS3 transforms to scroll within sections. Useful to speed up the movement in tablet and mobile devices with browsers supporting CSS3. If this option is set totrueand the browser doesn't support CSS3, a jQuery fallback will be used instead. -
normalScrollElements: (defaultnull) If you want to avoid the auto scroll when scrolling over some elements, this is the option you need to use. (useful for maps, scrolling divs etc.) It requires a string with the jQuery selectors for those elements. (For example:normalScrollElements: '#element1, .element2') -
normalScrollElementTouchThreshold: (default5) Defines the threshold for the number of hops up the html node tree pagePiling will test to see ifnormalScrollElementsis a match to allow scrolling functionality on divs on a touch device. (For example:normalScrollElementTouchThreshold: 3) -
keyboardScrolling: (defaulttrue) Defines if the content can be navigated using the keyboard -
touchSensitivity: (default5) Defines a percentage of the browsers window width/height, and how far a swipe must measure for navigating to the next section. -
animateAnchor: (defaulttrue) Defines whether the load of the site when given an anchor (#) will scroll with animation to its destination or will directly load on the given section. -
direction: (defaultvertical) Defines if the scroll is vertical or horizontal. -
menu: (defaultfalse) A selector can be used to specify the menu to link with the sections. This way the scrolling of the sections will activate the corresponding element in the menu using the classactive. This won't generate a menu but will just add theactiveclass to the element in the given menu with the corresponding anchor links. In order to link the elements of the menu with the sections, an HTML 5 data-tag (data-menuanchor) will be needed to use with the same anchor links as used within the sections. Example:
<ul id="myMenu"> <li data-menuanchor="firstPage" class="active"><a href="#firstPage">First section</a></li> <li data-menuanchor="secondPage"><a href="#secondPage">Second section</a></li> <li data-menuanchor="thirdPage"><a href="#thirdPage">Third section</a></li> <li data-menuanchor="fourthPage"><a href="#fourthPage">Fourth section</a></li> </ul>$('#pagepiling').pagepiling({ anchors: ['firstPage', 'secondPage', 'thirdPage', 'fourthPage', 'lastPage'], menu: '#myMenu' });Note: the menu element should be placed outside the pagePiling wrapper in order to avoid problem when using css3:true. Otherwise it will be appended to the body by the plugin itself.
-
navigation: (defaultfalse) If set totrue, it will show a navigation bar made up of small circles. -
sectionSelector: (default.section) Defines the jQuery selector used for the plugin sections. It might need to be changed sometimes to avoid problem with other plugins using the same selectors as pagePiling.js..
Methods
moveSectionUp()
Scrolls one section up:
$.fn.pagepiling.moveSectionUp();moveSectionDown()
Scrolls one section down:
$.fn.pagepiling.moveSectionDown();moveTo(section)
Scrolls the page to the given section.
/*Scrolling to the section with the anchor link `firstSection` */ $.fn.pagepiling.moveTo('firstSection'); //Scrolling to the 3rd section in the site $.fn.pagepiling.moveTo(3); //Which is the same as $.fn.pagepiling.moveTo(3);setAllowScrolling(boolean)
Adds or remove the possibility of scrolling through sections by using the mouse wheel/trackpad or touch gestures (which is active by default).
$.fn.pagepiling.setAllowScrolling(false);setKeyboardScrolling(boolean)
Adds or remove the possibility of scrolling through sections by using the keyboard arrow keys (which is active by default).
$.fn.pagepiling.setKeyboardScrolling(false);setScrollingSpeed(milliseconds)
Defines the scrolling speed in milliseconds.
$.fn.pagepiling.setScrollingSpeed(700);Callbacks
afterLoad (anchorLink, index)
Callback fired once the sections have been loaded, after the scrolling has ended. Parameters:
anchorLink: anchorLink corresponding to the section.index: index of the section. Starting from 1.
In case of not having anchorLinks defined in the plugin the index parameter would be the only one to use.
Example:
$('#pagepiling').pagepiling({ anchors: ['firstPage', 'secondPage', 'thirdPage', 'fourthPage', 'lastPage'], afterLoad: function(anchorLink, index){ //using index if(index == 3){ alert("Section 3 ended loading"); } //using anchorLink if(anchorLink == 'secondPage'){ alert("Section 2 ended loading"); } } });onLeave (index, nextIndex, direction)
This callback is fired once the user leaves a section, in the transition to the new section.
Parameters:
index: index of the leaving section. Starting from 1.nextIndex: index of the destination section. Starting from 1.direction: it will take the valuesupordowndepending on the scrolling direction.
Example:
$('#pagepiling').pagepiling({ onLeave: function(index, nextIndex, direction){ //after leaving section 2 if(index == 2 && direction =='down'){ alert("Going to section 3!"); } else if(index == 2 && direction == 'up'){ alert("Going to section 1!"); } } });afterRender()
This callback is fired just after the structure of the page is generated. This is the callback you want to use to initialize other plugins or fire any code which requires the document to be ready (as this plugin modifies the DOM to create the resulting structure).
Example:
$('#pagepiling').pagepiling({ afterRender: function(){ alert("The resulting DOM structure is ready"); } });Resources
CSS Easing Animation Tool - Matthew Lein
Who is using pagePiling.js
If you want your page to be listed here. Please contact me with the URL.
- http://www.facebookgroups.com/
- http://waltdisney.org/galleries
- http://www.logitech.com/en-gb
- http://www.adigoodrich.com/
- https://number26.de/
- http://fngeats.com/
- http://ednahouse.org/statistics/
- http://sushi.steadfastlight.com/
- http://netstorage.com.br/nucs/nucs.html
- http://aungthurhahein.me/
- http://mannydesigns.co
- http://www.unwander.com/
Donations
Donations would be more than welcome :)
License
(The MIT License)
Copyright (c) 2014 Alvaro Trigo <[email protected]>
Permission is hereby granted, free of charge, to any person obtaining a copy of this software and associated documentation files (the 'Software'), to deal in the Software without restriction, including without limitation the rights to use, copy, modify, merge, publish, distribute, sublicense, and/or sell copies of the Software, and to permit persons to whom the Software is furnished to do so, subject to the following conditions:
The above copyright notice and this permission notice shall be included in all copies or substantial portions of the Software.
THE SOFTWARE IS PROVIDED 'AS IS', WITHOUT WARRANTY OF ANY KIND, EXPRESS OR IMPLIED, INCLUDING BUT NOT LIMITED TO THE WARRANTIES OF MERCHANTABILITY, FITNESS FOR A PARTICULAR PURPOSE AND NONINFRINGEMENT. IN NO EVENT SHALL THE AUTHORS OR COPYRIGHT HOLDERS BE LIABLE FOR ANY CLAIM, DAMAGES OR OTHER LIABILITY, WHETHER IN AN ACTION OF CONTRACT, TORT OR OTHERWISE, ARISING FROM, OUT OF OR IN CONNECTION WITH THE SOFTWARE OR THE USE OR OTHER DEALINGS IN THE SOFTWARE.


