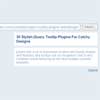
jquery-page-tour
JQuery-powered tour library that displays information about the page the user is on.
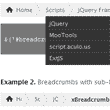
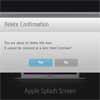
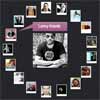
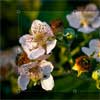
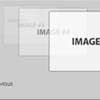
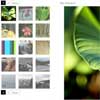
This is a quick little helper to spotlight DOMs on the page. Inspiration comes from Google's Android and Web-app help screens.
What does it do?
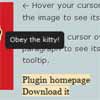
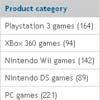
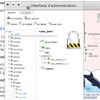
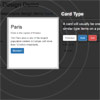
This library lets you highlight DOMs on the page, and explain what their purpose is to the user.
Features:
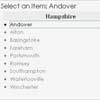
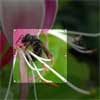
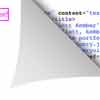
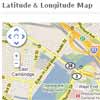
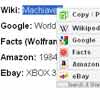
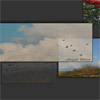
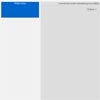
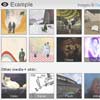
- Spotlights DOM objects
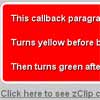
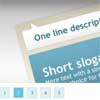
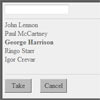
- Displays a title and description of each DOM object.
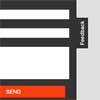
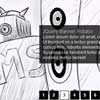
- Places animated targets around the DOM object to add emphasis on where to look.
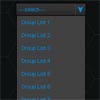
- Programmatically can move to next/previous items in the tour.
- Items can be ordered.
- Recalculates positions after window resizes.
Things To Do Still
- Update the location calculations to work better on Mobile/Small Screens
- Add more configuration options for styling
- Allow overriding the tour's functions (next/prev/exit)
How To Use
Prerequisites
- jQuery 3.x
- A modern browser that has CSS transitions and animations.
- (optional) Bootstrap 3.x/4.x
Note: By default, there are Bootstrap 3.x/4.x classes used for the control links in the tour. If you want to use them, you'll need to include the Bootstrap style sheet in your HTML. Otherwise, you'll probably want to add some style classes for the links and set them in the instantiation options.
Instantiation and Options
I'd recommend minifying the JS before using in production. The file isn't large, but everything adds up.
Obviously, include the JavaScript file in your HTML page. It's best practice to put the JS script tag as one of the last items in the HTML Body.
Basic Instantiation
The Page Tour JS file should be included after the jQuery library.
Note: When the tour initializes, it appends a style tag and a number of CSS rules to the document body. If the names of these rules conflict with your application's CSS, you can change the prefix used for the library.
After the JS file has been included on the page, the library can be instantiated by calling the page tour function:
// Instantiate the actual page tour object. var PageTour; try { PageTour = $.fn.PageTour(); } catch (e) { console.error('Cannot start page tour: ', e); }Options
You can instantiate the Page Tour with your own options:
var PageTour = $.fn.PageTour({ /* options */ });The following options are exposed:
prefix- [string default: 'tour'] Use this to change the full prefix of the CSS and HTML data attributeshorizontalPadding- [integer default: 20] - Used to add left/right padding to tour elementsverticalPadding- [integer default: 5] - Used to add top/bottom padding to tour elementsgeneralPadding- [integer default: 5] - Used to add padding to target and shadow elementsnextText- [string default: 'Next'] - The text shown on the "next" link.prevText- [string default: 'Previous'] - The text shown on the "previous" link.exitText- [string default: 'Exit'] - The text shown on the "exit" link.nextClass- [string default: 'btn btn-primary'] - The class for the "next" link.prevClass- [string default: 'btn btn-default'] - The class for the "previous" link.exitClass- [string default: 'btn btn-danger'] - The class for the "exit" link.defaultIndex- [integer default: '9999'] - The default index of items without a manually set index.styleOverwrites- [object default: { <empty> }] - Provides a way to overwrite the tour styles. Keys and Defaults:overlay-height: 100vh; width: 100%;tour-position: absolute;title-top: 0; left: 0; text-shadow: 0 0 10px #aaa; color: white; font-size: 2em; position: absolute; font-weight: bold !important; width: 20rem;description-top: 0; left: 0; box-shadow: 0 0 7px #666; border-radius: 7px; padding: 11px; color: white; font-size: 20px; position: absolute; width: 35rem; font-weight: normal !important;controls-top: 0; left: 0; margin: 8px 0; text-align: right; padding: 11px; color: white; font-size: 20px; position: absolute; z-index: 10000; transition: all 0.75s; transition-timing-function: ease-in-out;control_buttons-margin-right: 10px; box-shadow: 0 0 3px white;targets-top: 0; left: 0; border-radius: 50%; border: 1px solid #333; position: absolute; opacity: 0.3;target_large-border-radius: 50%; position: relative; height: 80%; width: 80%; top: 9%; padding: 0; margin: 0 auto;target_medium-border: 2px solid #666;target_small-border: 2px solid #aaa;transitions_main-transition: all 0.75s; transition-timing-function: ease-in-out;transition_box-transition-property: top, left; transition-duration: 0.75s; transition-timing-function: ease-in-out;transition_key_frame-from { box-shadow: 0 0 1px rgba(64, 64, 64, 0.78); } to { box-shadow: 0 0 8px white; }target_glow-animation-duration: 1s; animation-name: targetGlow; animation-iteration-count: infinite; animation-direction: alternate;target_glow-animation-duration: 1s; animation-name: targetGlow; animation-iteration-count: infinite; animation-direction: alternate;target_delay_1-animation-delay: 0.3s;target_delay_2-overflow: hidden; transition: all 0.75s; transition-timing-function: ease-in-out; position: absolute; border-radius: 5px;spotlight-overflow: hidden; transition: all 0.75s; transition-timing-function: ease-in-out; position: absolute; border-radius: 5px;
Pre-Defined Page Tour HTML Attributes
If you're not controlling the tour 100% programmatically, you can pre-define HTML DOM objects on the page for the tour.
In the HTML, each DOM you want to add to the pre-defined page tour must have at least one of the following attributes:
data-<prefix>-title: This attribute should be assigned the title of the DOM object tour stop.- example:
<div data-tour-title="DIV DOM Object"></div>
- example:
data-<prefix>-description: This attribute should be assigned the description of what the tour item is.- example:
<div data-tour-description="This is a DIV HTML object. It's used to be a container for other DOMs"></div>next Note: In our examples, the prefix is the default "tour" prefix.
- example:
Both of these attributes can (and really should) be used together. However, only one is necessary.
Ordering Tour Stops
To enforce an order of which tour items are stopped at, you can add the data-<prefix>-index attribute:
- example:
<div data-tour-index="1"></div>
The tour items are ordered by the index in a general integer sort. So you can skip numbers if that makes things easy. You can also use negative numbers.
Items without an index are actually defaulted to an index of 9999, though that can be changed via the defaultIndex option.
Programmatically Controlling the Tour
The tour assigns a window-scoped dict object as PageTour at initialization. The PageTour object has publicly accessible methods:
.switchTo(selector[, options])- Programmatically sets the tour focus, title, and description.selector[jQuery Object | String] : Use a jQuery object or selector path string of DOM object to focus tour on.options[optional Object] - Options for the switchTo method execution:title[optional String] : The title of the object.description[optional String] : The description of the object.next[optional Function] : A function to fire when the Next button is clicked. (Hidden if omitted)prev[optional Function] : A function to fire when the Previous button is clicked. (Hidden if omitted)
.open()- Opens the tour. If the tour has previously been opened, it will open from where it was left off..next()- Moves the tour on to the next tour item..prev()- Moves the tour back to the previous tour item..exit()- Closes the tour. opened, the DOMs are rediscovered.
The only methods completely necessary for tour operation is the .open() method or .switchTo() method. These methods start the tour. However, controls to proceed through the tour and exit the tour are displayed in the tour.
HTML Pre-configured Example:
// Instantiate the tour: var PageTour = $.fn.PageTour(); // Open the tour: PageTour.open();HTML Programmatic Example:
// Instantiate the tour: var PageTour = $.fn.PageTour(); // Open the tour to a specific DOM object: PageTour.switchTo('#some_DOM', { title: 'Some DOM Object', description: 'This is a DOM object on the page.', next: PageTour.switchTo('#another_DOM', {...}), prev: PageTour.switchTo('#a_previous_DOM', {...}) });