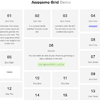
Awesome Grid 

A minimalist javascript library that allows you to display a responsive grid layout stacked on top of each other into rows and columns. Since v2.0.0, jQuery is not a dependency.
Checkout this branch v1 for the jQuery compatible plugin (with less features).
Table of contents
Browser support
- Chrome
- Firefox
- Safari
- Opera
- Internet Explorer 9+
Install
You can either download the tar ball from github or simply run the following bower command within your terminal.
$ bower install awesome-grid --saveInclude the js (minified) file in your html (footer)
<script src="bower_components/awesome-grid.min.js"></script>Usage
Minimal
.grid([int])
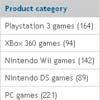
AwesomeGrid works on any element, provided we have a parent/children structure. For demonstration, we will use an unordered list.
HTML
<ul class="grid"> <li>One</li> <li>Two</li> <li>Three</li> <li>Four</li> <li>Five</li> </ul>Script
new AwesomeGrid('ul.grid').grid(5);Where
.grid([int])takes an integer as the first argument for the number of columns the grid should be spread over.
Data Attribute
If you prefer not using a script to invoke the grid, a data attribute sugar may be used instead.
<ul data-awesome-grid="5"> <li>One</li> <li>Two</li> <li>Three</li> <li>Four</li> <li>Five</li> </ul>Gutters
.gutters({column:[int], row:[int]}).gutters([int])
Gutters allow adding spacing between rows and columns.
new AwesomeGrid('ul.grid') .gutters({ column : 20, row : 10 }).grid(5)This will provide a 20px spacing between the columns (horizontal splits) and a 10px spacing between the rows (vertical splits).
via data attribute
Add gutter spacing via data-attributes instead.
<ul class="grid" data-ag-gutters-column="20" data-ag-gutters-column="10"> ... </ul>Alternately
If both columns and rows are of same pixels, a single value may be provided.
new AwesomeGrid('ul.grid') .gutters(20) .grid(5)via data attribute
Add gutter spacing via data-attributes instead.
<ul class="grid" data-ag-gutters="10"> ... </ul>To enforce js provided gutters over the data attributed gutters, simply pass true as the second argument ~
.gutters([int], true)
Scroll
.scroll([fn])
We may easily provide new children when the window has scrolled across the bottom edge of the grid.
new AwesomeGrid('ul.grid') .grid(5) .scroll(function(done){ // fetch_for_new_data(); done(['html1', 'html2',...]) })The callback function will be triggered once the user has scrolled passed the bottom edge of the grid. Simply provide some html content as an array by calling the provided callback (first argument) and they will get stacked onto the grid.
done('html1', 'html2');also works instead of passing an array.
Dynamic children
.apply()
If for any reason, we add some children onto the grid externally, the apply function comes in handy.
var Grid = new AwesomeGrid('ul.grid').grid(5); // Add some children at a later time. // Then invoke apply() to stack them onto the grid. Grid.apply();Whenever we add new children externally (at a later stage?), the grid will not know about them. So
apply()will notify the grid to adopt these children and eventually stack them on.
Note: Do not confuse
.applywith.scroll. The latter will adopt the new children automatically as it knows what to do.
Stretching
data-ag-x="[int]"*~ html*
Often times we would like some children to take over more than one column/space. We can do so by providing a data attribute to the child element.
<ul data-awesome-grid="5"> ... <li data-ag-x="3">...</li> ... </ul>The list item will stretch/widen itself thrice than normal (one).
Responsiveness
AwesomeGrid is deeply responsive via simple human readable function calls.
We use a bottom up approach, meaning the default grid is applied on the minimal screen size and responds to any breaking point(s) going upwards (mobile, tablet, desktop, tv) based on the device we would like to respond to.
By default, the breaking points are as follows:
mobile : 420 (px) tablet : 768 (px) desktop : 992 (px) tv : 1200 (px) To override these breaking points, pass an object as the second argument to the constructor.
new AwesomeGrid('ul.grid', { desktop: 840 })The desktop breaking point will now be
>= 840
In order to change the context of the boundary to which the grid will adhere to, which is the window by default, we may simply pass a context to the constructor arguments object.
new AwesomeGrid('ul.grid', { context: 'self' ... })This will make the width of the grid as the basis on which to trigger the responsive breaking points instead of the width of the viewport/window.
Mobile
.mobile([int]).mobile([int], [int]).mobile([int], {column:[int], row:[int]})
In order to respond to the mobile breaking point, simply call .mobile.
new AwesomeGrid('ul.grid') .grid(1) // 1 column split for small screen size. .mobile(2); // 2 column split for mobile screen size.Start with 1 column split. When the mobile screen size (420px?) breaking point is triggered, the columns will split into 2.
Adding gutters
We may want to agree on a different gutter size for the mobile specific view. Doing so is easy too.
new AwesomeGrid('ul.grid') .gutters(5) // default gutter size = 5px .grid(1) .mobile(2, 10); // mobile view gutter size = 10pxBy default, a 5px row and column gutter size. When mobile screen size is detected, the gutter size will converge to a 10px row and column.
Note:
.mobile(2, 10)is a shorthand notation for the more explicit.mobile(2, {column:10,row:10})call.
Tablet
.tablet([int]).tablet([int], [int]).tablet([int], {column:[int], row:[int]})
In order to respond to the tablet breaking point, simply call .tablet.
new AwesomeGrid('ul.grid') .grid(1) // 1 column split for small screen size. ... ... .tablet(4); // 4 column split for tablet screen size.Start with 1 column split. When the tablet screen size (768px?) breaking point is triggered, the columns will split into 4.
Adding gutters
We may want to agree on a different gutter size for the tablet specific view. Doing so is easy too.
new AwesomeGrid('ul.grid') .gutters(5) // default gutter size = 5px .grid(1) ... ... .tablet(4, 10); // tablet view gutter size = 10pxBy default, a 5px row and column gutter size. When tablet screen size is detected, the gutter size will converge to a 10px row and column.
Note:
.tablet(4, 10)is a shorthand notation for the more explicit.tablet(4, {column:10,row:10})call.
Desktop
.desktop([int]).desktop([int], [int]).desktop([int], {column:[int], row:[int]})
In order to respond to the desktop breaking point, simply call .desktop.
new AwesomeGrid('ul.grid') .grid(1) // 1 column split for small screen size. ... ... .desktop(6); // 6 column split for desktop screen size.Start with 1 column split. When the desktop screen size (992px?) breaking point is triggered, the columns will split into 6.
Adding gutters
We may want to agree on a different gutter size for the desktop specific view. Doing so is easy too.
new AwesomeGrid('ul.grid') .gutters(5) // default gutter size = 5px .grid(1) ... ... .desktop(6, 10); // desktop view gutter size = 10pxBy default, a 5px row and column gutter size. When desktop screen size is detected, the gutter size will converge to a 10px row and column.
Note:
.desktop(6, 10)is a shorthand notation for the more explicit.desktop(6, {column:10,row:10})call.
Tv
.tv([int]).tv([int], [int]).tv([int], {column:[int], row:[int]})
In order to respond to the tv breaking point, simply call .tv.
new AwesomeGrid('ul.grid') .grid(1) // 1 column split for small screen size. ... ... .tv(8); // 6 column split for tv screen size.Start with 1 column split. When the tv screen size (1200px?) breaking point is triggered, the columns will split into 8.
Adding gutters
We may want to agree on a different gutter size for the tv specific view. Doing so is easy too.
new AwesomeGrid('ul.grid') .gutters(5) // default gutter size = 5px .grid(1) ... ... .tv(8, 10); // desktop view gutter size = 10pxBy default, a 5px row and column gutter size. When tv screen size is detected, the gutter size will converge to a 10px row and column.
Note:
.tv(8, 10)is a shorthand notation for the more explicit.tv(8, {column:10,row:10})call.
Events
.on('item:stacked', [function]).on('grid:done', [function]).on('grid:scrolled', [function]).on('grid:device', [function]).off().off([string]).off([string], [function])
item:stacked
The event will be triggered whenever a child item gets stacked on to the grid.
new AwesomeGrid('ul.grid') .on('item:stacked', function(event, element, rows, columns, device){ console.log(this); // item console.log(event); // event name console.log(element); // grid container console.log(rows); // array of row numbers console.log(columns); // array of column numbers console.log(device); // device screen name }).grid(5);grid:done
When the grid stack is complete, this event will be triggered.
new AwesomeGrid('ul.grid') .on('grid:done', function(event, device){ console.log(this); // grid container console.log(event); // event name console.log(device); // device screen name }).grid(5);grid:scrolled
This event will be triggered when the scrollbar gets past the bottom edge of the grid.
new AwesomeGrid('ul.grid') .on('grid:scrolled', function(event, device){ console.log(this); // grid container console.log(event); // event name console.log(device); // device screen name }).grid(5);grid:device
Whenever the device screen size changes, this event will be fired.
new AwesomeGrid('ul.grid') .on('grid:device', function(device, previous){ console.log(device); // device screen name console.log(previous); // previous screen name }).grid(5);Turn off all events
To turn off all events, simply call .off()
new AwesomeGrid('ul.grid') .on(...) .on(...) ... ... .off();Turn off specific events
To turn off all events of a specific type, simply call .off([string:event-name])
new AwesomeGrid('ul.grid') .on('item:stacked', callback_fn) .on(...) ... ... .off('item:stacked');Turn off an event
To turn off an event, simply call .off([string:event-name], [function])
new AwesomeGrid('ul.grid') .on('item:stacked', callback_fn) .on(...) ... ... .off('item:stacked', callback_fn);Development
$ npm installTest
$ gulp testBuild
$ gulp jsTest & Build
$ gulpLicense
Released under the MIT License.