jQuery Accessible Tabs 
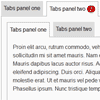
Creates accessible tabs - a single content area with multiple panels.
Usage
To get started you can either:
- Clone the repo:
git clone https://github.com/nomensa/jquery.accessible-tabs.git - Or install with Bower:
bower install jquery.accessible-tabs
Then it's just a case of including the following scripts on your page, best at the bottom:
<script src="//ajax.googleapis.com/ajax/libs/jquery/1.11.1/jquery.min.js"></script> <script src="jquery.accTabs.min.js"></script>Options & Defaults
defaultTab
Type: integer
Default: 0
Description: Specify which tab to open by default using 0-based position
callbackCreate
Type: function
Description: Callback when the plugin is created
callbackDestroy
Type: function
Description: Callback when the plugin is destroyed
containerClass
Type: string
Default: 'js-tabs'
Description: A class applied to the target element
controlActiveClass
Type: string
Default: 'js-tabs_control-item--active'
Description: A class applied to the active tab control
controlsText
Type: string
Default: 'Use the tab and enter or arrow keys to move between tabs'
Description: An explanation of how the tabs operate, which is prepended to the tabs content
controlsTextClass
Type: string
Default: 'js-tabs_control-text'
Description: Class to apply to the controls text element
tabControlsClass
Type: string
Default: 'js-tabs_control'
Description: Class to apply the controls list
tabControlId
Type: string
Default: 'js-tabs_control-item--'
Description: Ids for tab controls should start with the following string
tabPanelClass
Type: string
Default: 'js-tabs_panel'
Description: Class to be applied to the tab panel
tabPanelId
Type: string
Default: 'js-tabs_panel--'
Description: Ids for tab panels should start with the following string
panelActiveClass
Type: string
Default: 'js-tabs_panel--active'
Description: Class to be applied to the active tab panel
callbackTabActivated
Type: function
Description: Callback when a tab is clicked
Development
This plugin requires:
Node
First time setup of this plugin will require the node packages to be installed. On Windows use the command prompt with Ruby or on a Mac use terminal, install the global node.js packages:
$npm installGrunt
If you haven't used Grunt before, be sure to check out the Getting Started guide, as it explains how to install and use Grunt.
You will need to install the Grunt CLI (command line interface):
$ npm install -g grunt-cli # => if you have used grunt before you probably have this (this can be run from any directory)Next install the plugin's node packages:
$ npm installWatcher
Running grunt (with watcher) will watch for any changes and recompile - best used during development:
$ gruntConnect server (optional)
You can run a connect web server on http://0.0.0.0:9001, if required, when running grunt:
$ grunt --connect # => Running "connect:server" (connect) task # => Started connect web server on http://0.0.0.0:9001 # => Running "watch" task # => Waiting...Copyright © 2014 @nomensa
Licensed under MIT
